How to install a wall starting base for your Neva fence
Installing a Neva wall starting base
The Neva wall starting base allows you to install a fence post flush to a wall, and have the fence run seamlessly from this. You can only use an aluminium post with the wall starting base, so be aware of this when purchasing the materials for the job.
For this project, we are installing the wall starting base onto a solid (paved) surface and a 183cm aluminium post to the wall, but you could also use a 95cm, 139cm or 240cm post with the wall starting base. You just have to remember to buy the right post height for your project to slot onto the wall starter base, as a post is not included with the wall starter base.
If there is not a solid base surface directly next to the wall where you want to fix the wall post, then you could fix the post only to the wall to run the fence from and not have the base attached. You will however, need to raise the bottom of the fence off of the ground in the absence of a base. However, this scenario is not shown in this guide.


Here’s what to do to fit the base to a solid surface (concrete or paving) and the post to a brick wall.
Tools for the job
- Claw hammer
- Nail punch
- Cross-head screwdriver, hammer drill / driver or an electric screwdriver
- 8mm (diameter) masonry drill bit and 6mm (diameter) metal drill bit
- Neva wall starting base (note: the aluminium post is available separately). The wall starting base has a profile that allows the post base to be screwed down onto a solid surface and the neck flush against a wall to house the post.
- Neva aluminium slotted fence post kit – 95cm
- Neva aluminium slotted fence post kit – 139cm
- Neva aluminium slotted fence post kit – 183cm
- Carpenter’s pencil
- 8mm (diameter) x30mm masonry wall plugs, x2 required
- 5mm or 6mm (diameter) x90mm exterior screws, x2 required
- Tape to make a depth gauge when drilling
Install the wall starting base first and then measure out and install the other posts from this first post.
Step 1
First we need to prepare the post. Slide off and remove the base cover cap from the bottom of the aluminium post kit.


Step 2
Lift out the top of the post from the base. This post base and cover is no longer required as we will be using a new wall starter base instead. It can either be kept as a spare or disposed of responsibly.


Step 3
Slide the post onto the wall starting base, and attach the base’s cover cap.


Step 4
Position the long edge of the base against the wall. The recesses of the aluminium post should point away from the wall in all directions, see the bird’s eye view, below. The arrows indicate which directions the fence can go from the post, but it would typically go from the centre recess.


Step 5
Next, you need to mark the fixing holes and fix the base to the floor, to do this, see How to install a Neva post onto a solid surface (concrete or paving), steps 1 through to 8. This section also includes guidance on checking that the post is plumb plus tips on aligning the adjacent posts from the start post with a builder’s line.


Step 6
With the base secured to the floor, it’s time to fix the post to the wall.
Measure approximately 50cm up from the floor and mark a drill hole in the centre of the post, but adjust it up or down so it will go through the mortar rather than the brick itself.
Do a repeat mark, this time approximately 10cm down from the top of the post. It does not matter how tall the post is you use, it would be approximately 10cm from the top for all the posts. Again, make the mark so the drill hole will go through the mortar, not the brick.


Step 7
With a nail punch and hammer, knock a small indent into the aluminium post onto the two marks, this will help stop the drill bit from slipping when you start to drill through. Use the smallest punch available in a set, typically 1/8”.
Step 8
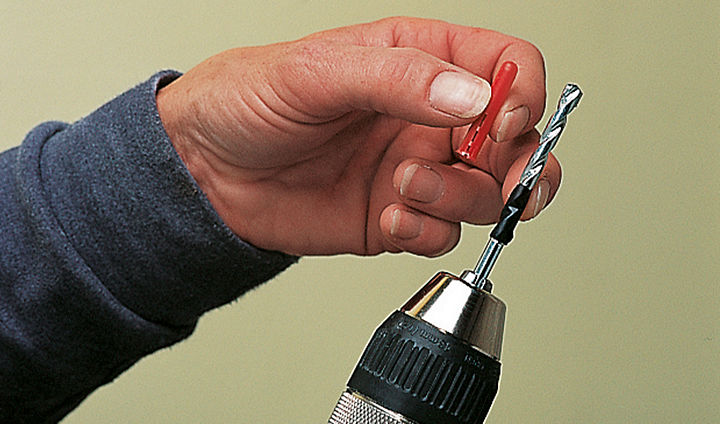
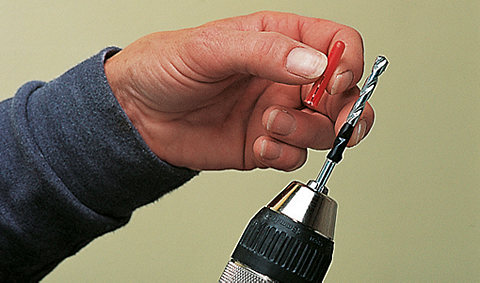
Set your hammer drill up with a 6mm gauge metal drill bit, turn the hammer action off and drill two holes through the centre of the post’s recess.
Step 9
With the holes drilled into the post, mark with a carpenter’s pencil through the two holes onto the wall.
Step 10
Remove the post from the start base and change the drill bit to a 8mm (diameter) masonry drill bit and turn the hammer action to on.
Some drills have a depth control bar or depth guide (read the product manual on how to set this up). Alternatively, you can make your own depth gauge so you know exactly how to deep to drill a hole for your wall plug.
Hold the wall plug up to your drill and mark its length on the bit with some tape. You'll need to drill into the wall slightly deeper than the length of the wall plug.

Start drilling firmly, gradually increasing the drill speed until you reach the required depth. Repeat for both holes.
Step 11
Still wearing safety goggles, clear out as much masonry debris as possible from the holes with a quick blow. Alternatively use a can of compressed air or an air compressor, if you have one. Removing the debris and dust from the hole helps the fixings to be fully inserted.
Step 12
Push home the two wall plugs into the wall. If required, tap the wall plugs in with a hammer so they are flush with the wall.
Slide the post back onto the base.
Step 13
Insert a 90mm exterior screw through the two post holes and screw them directly into the wall plug with a screwdriver. You could use a manual or electric screwdriver or use the drill driver with the correct bit attached.


Step 14
With the wall starting base and post installed, it’s now time to measure out and install the next post, see How to install a Neva post support onto a solid surface or How to install Neva posts directly into concrete if the next post is on a soft surface, for what to do next.


