Christmas clearance has landed! Click + Collect selected items in just one hour. Shop now >>
How to prepare to lay laminate & real wood flooring
Steps to achieve the perfect floor
Preparation is the secret to laying a laminate, real wood top layer or solid wood floor that’s durable and looks great. The sub-floor beneath should be smooth, dry and level. And before the flooring goes down, you’ll need to lay underlay as this will make the flooring easier to fit, help it to last longer and will improve sound and heat insulation.
In this guide we’ll walk you through how to;
- Calculate how many packs of flooring will be needed
- Acclimatise your flooring
- Prepare your sub-floor for underlay
- Lay underlay and moisture protection on your sub-floor
Once you’ve prepared your sub-floor, you’ll be ready to lay your flooring. Our guide to laying laminate and wood flooring gives you all the advice you’ll need with step-by-step instructions.


Materials
- Laminate/ wood flooring underlay - choose between foam or fibreboard (also known as fibre sheet)
- Damp-proof membrane - also known as vapour barrier, if you have a concrete sub-floor and aren’t using an underlay with integrated damp-proof membrane
- Waterproof tape - if using damp-proof membrane
- Laminate underlay joint tape
- Polythene sheet - if you have a concrete sub-floor and don’t have a moisture meter
- Timber off-cuts or timber batons - to help the flooring acclimatise and to fill any gaps in wooden sub-floor, if needed
Tools
- Hammer - for a wooden sub-floor, if needed
- Nail punch - for a wooden sub-floor, if needed
- Combi drill - for a wooden sub-floor, if needed
- Plane, sander or sandpaper - for a wooden sub-floor, if needed
- Wood adhesive - for a wooden sub-floor, if needed
- Vacuum cleaner or broom
- Utility knife - also known as a retractable knife
- Metal rule or straight piece of timber
Protective kit
- Wear a pair of knee pads. Laying flooring means that you’ll be working on your knees for much of the time. Stay comfortable by letting knee pads take the strain.
Laminate, real wood top layer and solid wood flooring comes in packs which tell you the area they will cover in square metres (m2). Most packs cover approximately 1m2, but some cover a little less or a little more. Check the product page online or product packaging for the coverage of your chosen flooring. Once you have this information, you can work out how many packs you’ll need by calculating the area of your room.
Step 1
Measure the room’s length and width in metres.
In this example, our room is 4.2m long and 2.2m wide.
Step 2
Multiply the length of the room by the width to find the area in square metres. If you have an odd-shaped room, divide it into separate rectangular areas and calculate each individually. Add the figures together to get the total room area.
Length (m) x Width (m) = Size of area (m2)
4.2m x 2.2m = 9.24m2
Step 3
Divide the total area of the room by the coverage per pack. This will give you the number of packs you require.
Size of area (m2) / Coverage per flooring pack (m2) = Number of flooring packs needed.
Our chosen flooring comes in a pack that covers 1.25m2.
9.24m2 / 1.25m2 = 7.39 packs
Step 4
We recommend always buying an extra 10% for wastage. You might find that when you cut flooring to fit around obstacles that you need a few extra boards, so it’s best to have a few more to hand.
Multiply the total number of packs by 1.1 to allow for this.
Total number of packs x 1.1 = Total number of packs needed including wastage.
7.39 x 1.1 = 8.13 packs
Step 5
Round the pack number up to the nearest whole number. In our example, this would be nine packs of flooring. Don’t forget that if you don’t need all the packs, you can return any unopened ones. Check out our Returns and refunds policy for more details.


Once your new flooring is home, let it adjust to the temperature and humidity of the room it will be fitted in.
Acclimatising your flooring will reduce the likelihood that gaps will appear between flooring boards. Because the flooring might have been stored at a different temperature or humidity to your home, exposing it to the same conditions as your home helps to stop the boards shrinking or expanding.
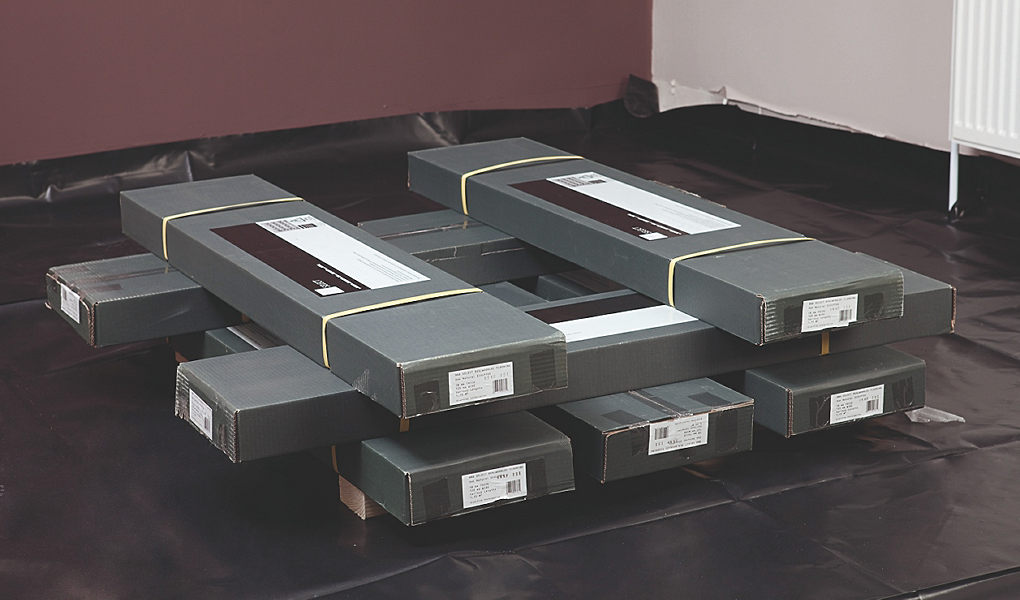


Step 1
Stack the boards flat, in their packaging, in a way that lets air circulate between the packs (as pictured).
Raise the lowest packs off the floor on off-cuts of wood. Don’t lean the flooring packs against the wall as this can cause the boards to bow.
Step 2
If you're using fibreboard underlay, do the same.
Step 3
Leave the flooring stacked in this way for 48 hours.
Get your room ready for the start of your new flooring project.
Step 1
Empty the space of furniture and any removable floor coverings, such as rugs and mats.


Step 2
Remove any existing flooring, such as carpet, laminate, vinyl or tiles as well as anything used to fix this in place – gripper rods, adhesive or similar.
We advise against laying laminate or solid wood flooring on top of tiled surfaces or old flooring as this may not be level and can trap damp and moisture below a new floor. Instead, start your new project with a bare concrete floor or wooden floorboards, that may or may not have plywood or oriented strand board (OSB) sheets fitted on top.
Before laying the underlay, it's essential to ready the sub-floor. Concrete sub-floors should be completely dry, while wooden ones need to be smooth and level before underlay can be laid.
Step 1
Check the newly-exposed sub-floor for any unevenness or damage.
If any is found, head to our guide for advice on how to level a sub-floor - both concrete and wooden - as well as replace a wooden floor.
Step 2
If your sub-floor is wooden - jump to Step 4.
If your sub-floor is concrete - read on.
Check that the concrete sub-floor's surface is dry. This is particularly important if it's been recently laid. If this is the case, allow a minimum of one day’s drying time for every 1millimetre (mm) in depth of concrete laid.
Once this time has elapsed, use a moisture meter to check that the surface is dry. The moisture content of the floor should be no more than 2 to 3%.
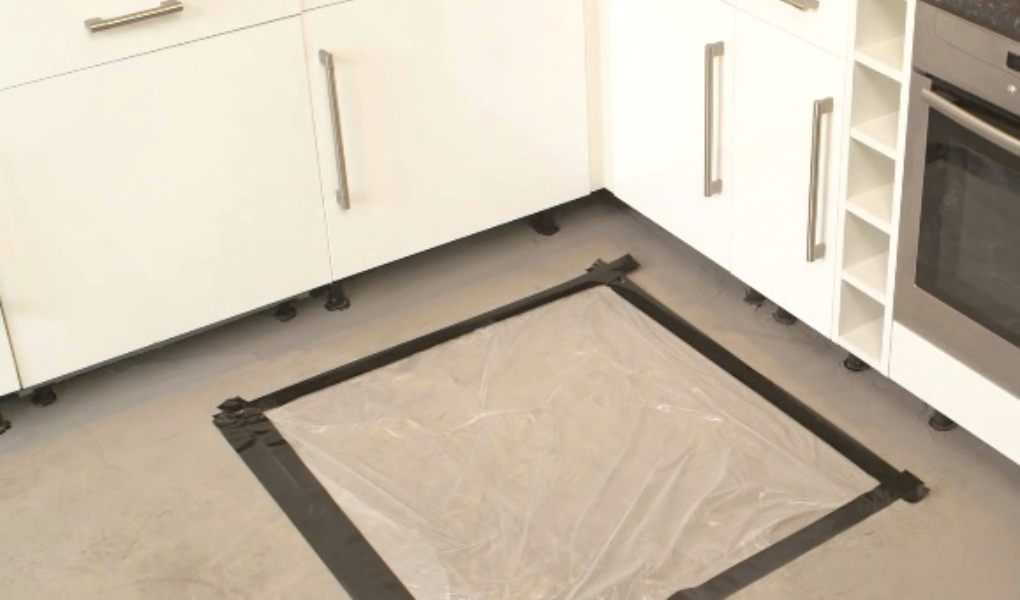
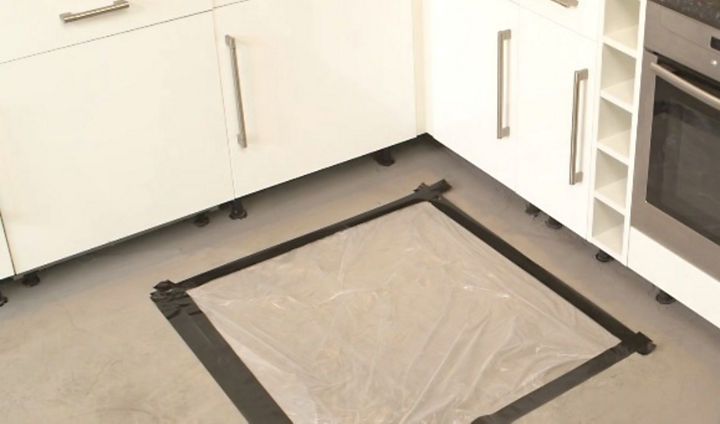
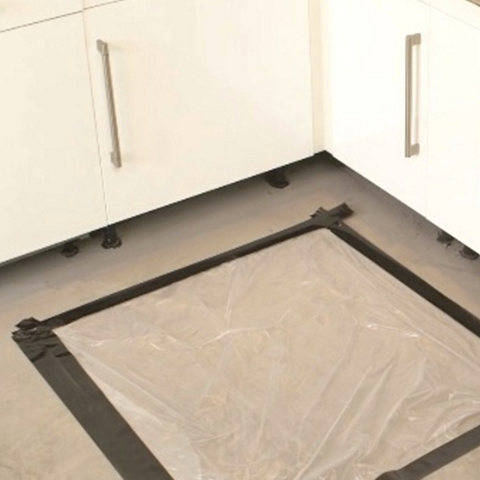
If you don’t have a moisture meter, test for damp by taping a sheet of polythene to the floor overnight. In the morning, check for the following;
- Discoloration of the concrete under the sheet compared to the area around it
- Condensation or water droplets on the underside of the sheet
- Condensation or water droplets on the underside of the sheet
Step 3
Treat any detected dampness before you lay underlay. If the floor is newly-laid, leave it for a few more days and then repeat the test. If the floor isn’t new, seek advice from a damp-proofing specialist.
Once the concrete sub-floor is dry, jump to Step 6.

Step 4
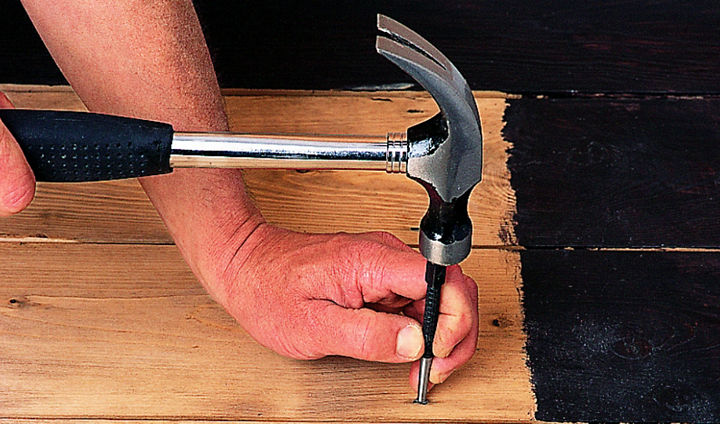
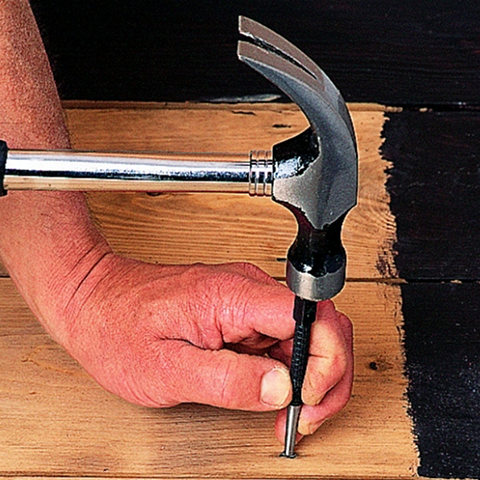
Check that all of the wooden floorboards are firmly screwed down and do so if they're not.
Drop any raised nails with a hammer and nail punch.
Step 5
Fill any wide gaps between floorboards with thin wedges of wood glued in place with wood adhesive. Sand or plane flush with the floorboards once dry.
Step 6
Dust and vacuum the sub-floor to ensure it’s free from dirt.
Now that your sub-floor is ready, you can prepare to lay underlay. Not only will this help to achieve a neater finish when you lay your flooring on top, it’ll also protect the flooring from moisture, create a more durable surface and insulate against the cold and sound.
It’s important to use the right type of underlay for the sub-floor.
For a concrete sub-floor, there are two options. Lay either:
- a damp-proof membrane underneath underlay
- or a product that combines the two.
For a wooden or plywood sub-floor, lay:
- underlay only
-
There are a variety of underlay materials available. We’ll show you how to lay:
- foam underlay - suitable for concrete and wooden/ plywood sub-floors. This features an integrated damp-proof membrane so a separate one isn't needed for concrete floors. Continue to the following section 'How to lay foam underlay'.
- fibreboard underlay - also suitable for both types of sub-floor. If using this, a concrete sub-floor will also need a damp-proof membrane. Jump to the section 'How to lay damp-proof membrane'.


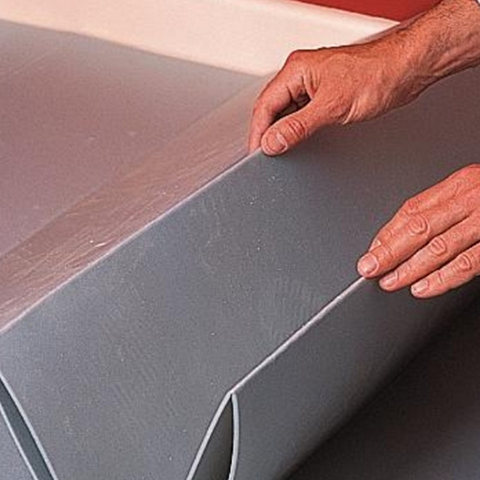
Foam underlay comes either as long lengths, folded into a concertina, or as individual tiles that slot together like a jigsaw puzzle. Whichever option you choose, the way that the underlay is installed is largely the same.


Step 1
Starting from the same point in the room you intend to start laying your flooring, unfold the underlay or begin to slot tiles together running in one direction.
Step 2
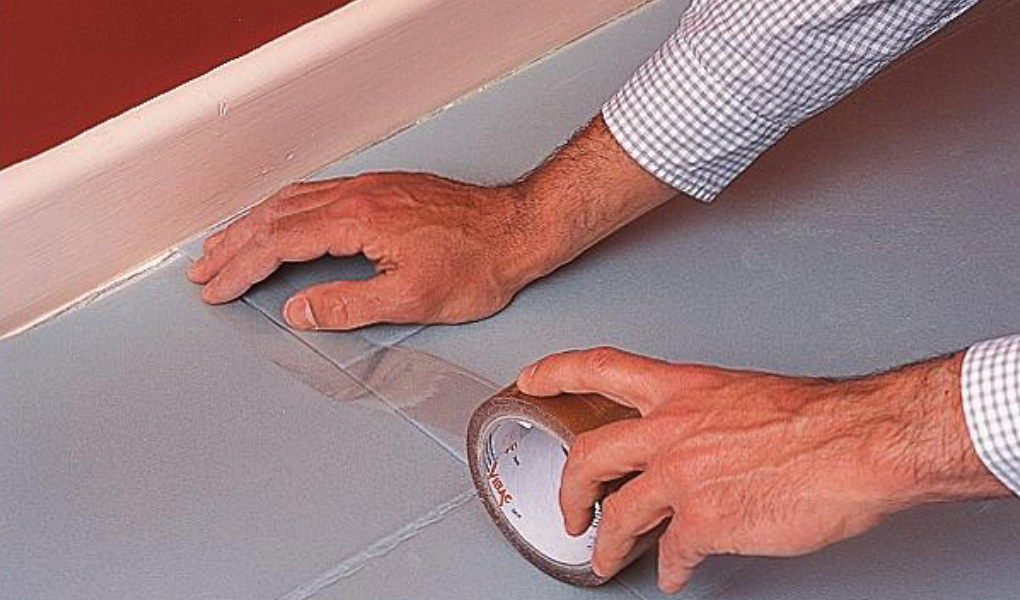
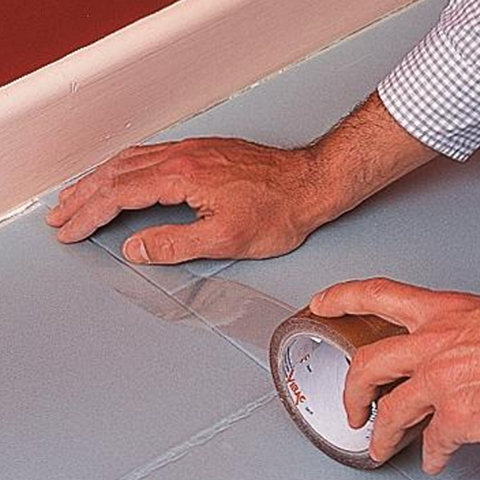
Add more lengths of underlay if needed, firmly taping any joints with waterproof tape until you reach the far wall. Trim to fit using a utility knife and straightedge, such as a rule.

Step 3
Lay the next row of underlay side by side and repeat all steps. Make sure the rows butt up to each other but don't overlap.
Once both rows are laid, seal the joint between the two with waterproof tape.
Step 4
If there are pipes rising out of your sub-floor (for example, below radiators), use a utility knife or scissors to cut around these. Leave a 10mm gap between the pipe and the underlay.
Step 5
Repeat until underlay covers the whole floor.
Once your underlay is in place, you’re ready to start laying flooring on top. Find complete instructions in our guide to laying laminate and solid wood flooring.
If you're laying a non-foam (fibreboard) underlay on a concrete floor, lay a damp-proof membrane first.
Step 1
Lay the damp-proof membrane across the floor, starting in the furthest corner of the room from the door.
If skirting boards aren't fitted in the room, allow the membrane to run 50mm up the wall. If you already have skirting boards fitted, the damp-proof membrane should run up the wall enough to fill the gap between the floor and the base of the skirting board.
Step 2
In a small room (where the sheet is larger than the room) - trim around the edge of the room using a utility knife until the damp-proof membrane fits (allowing for the required overlap with the walls).
In a large room (where more than one sheet is needed) - join sheets by butting the two together and taping with waterproof tape. Work lengthways across the room and trim any excess damp-proof membrane as above.
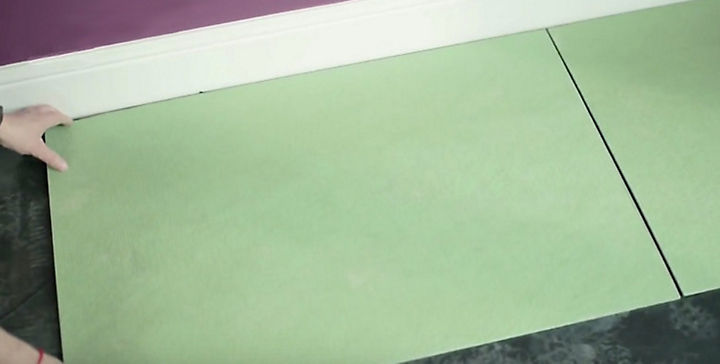
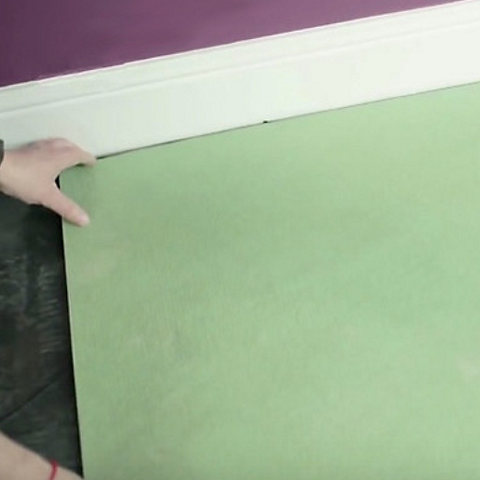
Fibreboards need to be laid at a 90 degree angle to the direction your flooring will be laid. Work out a plan for laying your flooring before you begin so that your underlay runs in the correct direction.

Step 1
Loose lay the boards, leaving a 10mm gap between the boards and the edge of the room and a 2mm gap between each board.
Start from the wall adjacent to where you intend to begin laying your flooring, so these boards are at a 90 degree angle to the flooring. Stagger the joints in a brick pattern to make a stronger, more stable base.

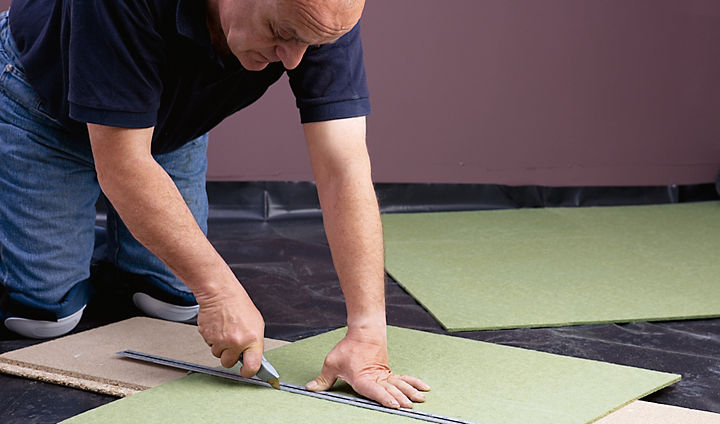
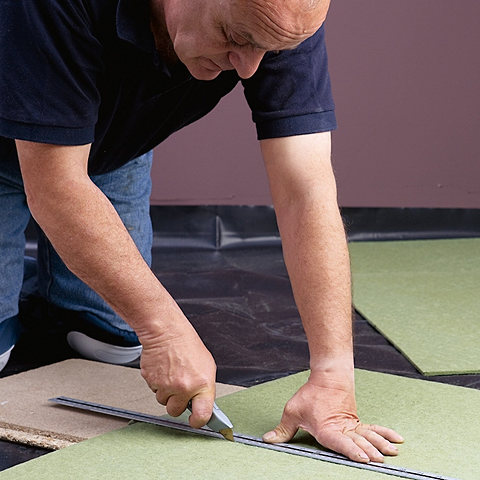
Step 2
In order to stagger the boards, some boards will need to be trimmed to fit. This can be done using a knife and a straightedge on a work bench.
Continue until underlay covers the whole floor.
With all of your underlay in place, you’re ready to start laying flooring on top. Find complete instructions in our guide to laying laminate and solid wood flooring.