Installing a Site roof window: Stage 4
How to install the window flashing kit
This series of guides will take you through the process of installing a Site roof window on high profile clay tiles using a Site flashing kit designed for these tiles.


Each section is detailed to ensure you get all the information you’ll need to help you complete the job.
The project has been split in to several articles to take you through each stage of the process in manageable chunks.
Stage 1:
Stage 2:
Stage 3:
Stage 4:
Using an angle grinder
-
Wear safety goggles and a dust mask when using an angle grinder.
-
Don’t cut the tiles on the roof. Mark the cutting line with a pen, remove the tiles and then cut / chamfer the tiles on the ground (outside).
- Site flashing kit
- Safety goggles and dust mask when using an angle grinder


With the roof window in place, you’re now ready to install the flashing kit.
The flashing installation will vary depending on the roof tiles you have and the flashing kit required. Don’t forget to read and follow any specific product instructions provided with the flashing kit before you start.
For this project example, we are fitting a flashing kit designed for wavy tiles.
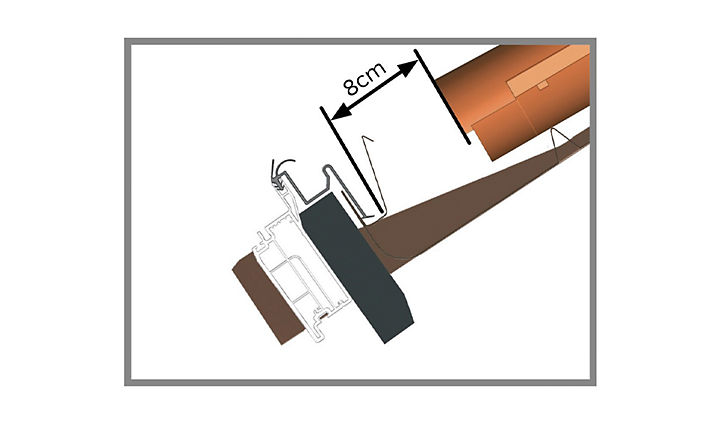
Step 1
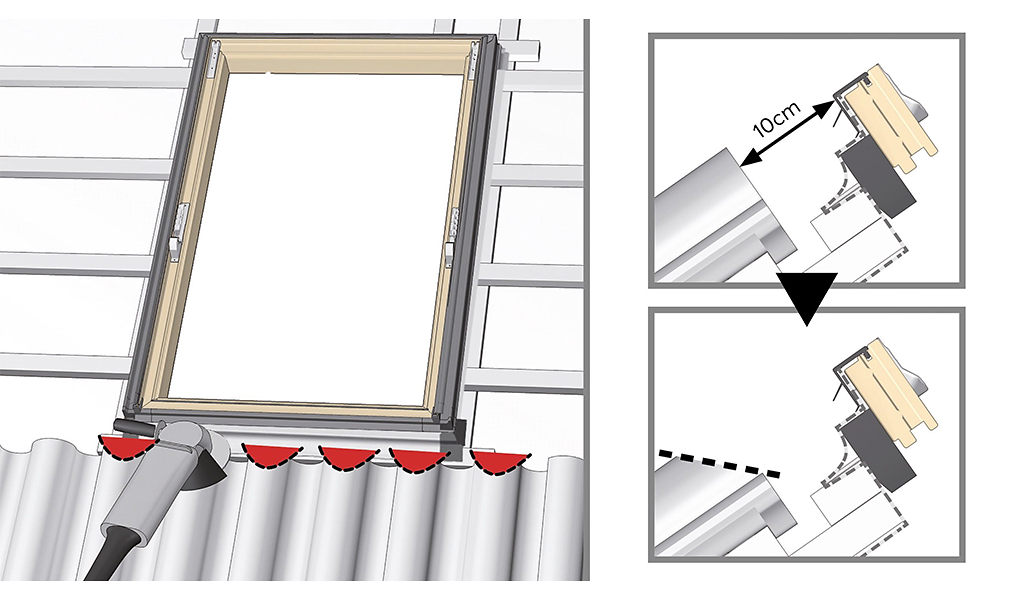
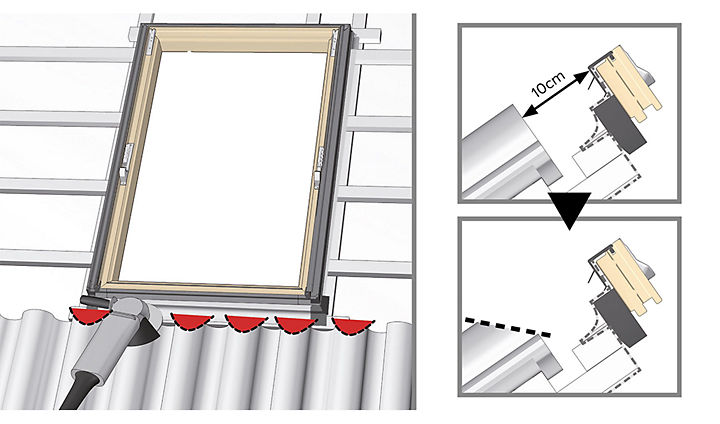
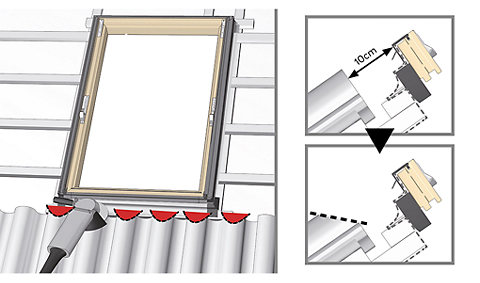
Adjust the top of the tiles at the base of the window frame as per the flashing kit installation guide. For this installation, the top of the tiles are fitted 10cm below the frame, and an angle grinder is used to chamfer the top edges to the correct profile for the flashing kit.
Once the tiles are cut / chamfered, re-install the tiles underneath the window.
Step 2
Install the bottom part of the flashing under the gasket located on the frame of the window. Screw in place with the two screws supplied.
Don’t smooth down the flashing just yet.


Step 3
Fit the two side flashing sections onto the gaskets located on the frame of the window and push the clips into place.
Mount the upper frame of the flashing, again this is fitted onto the gaskets of the window frame, and simply clipped into position.
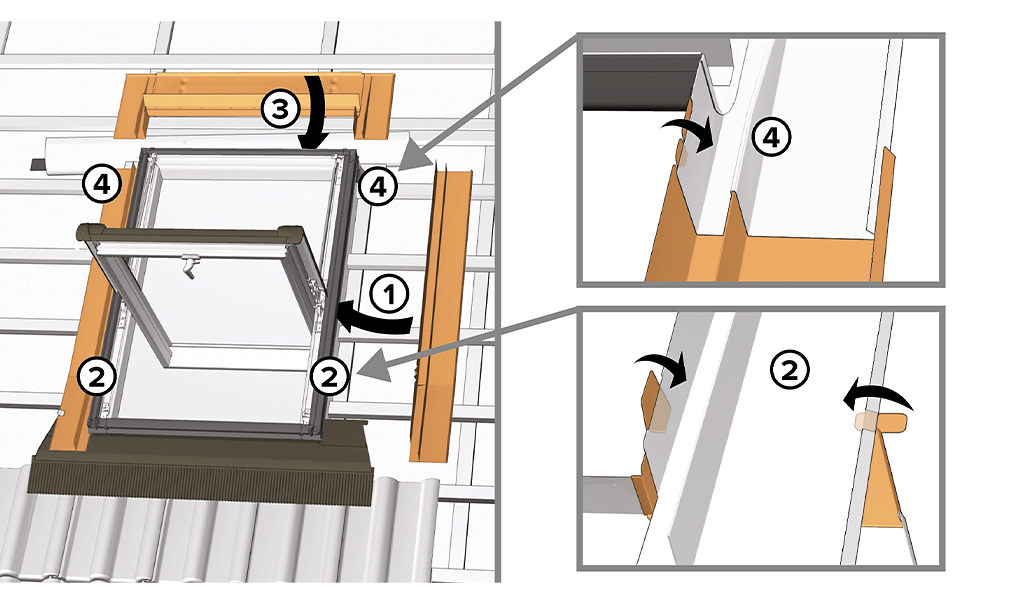
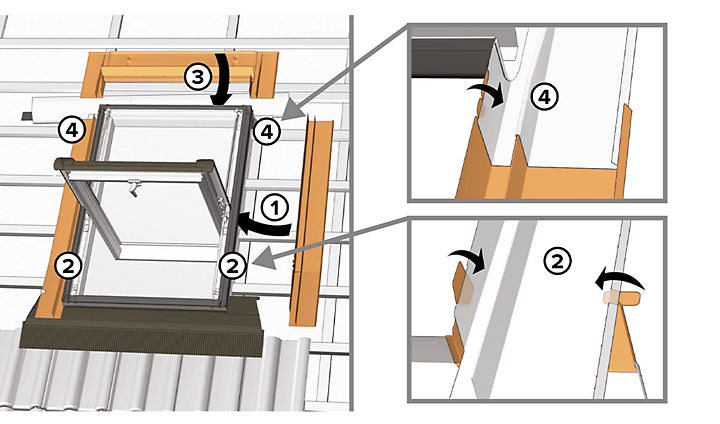
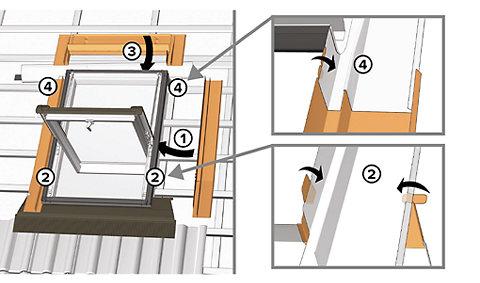
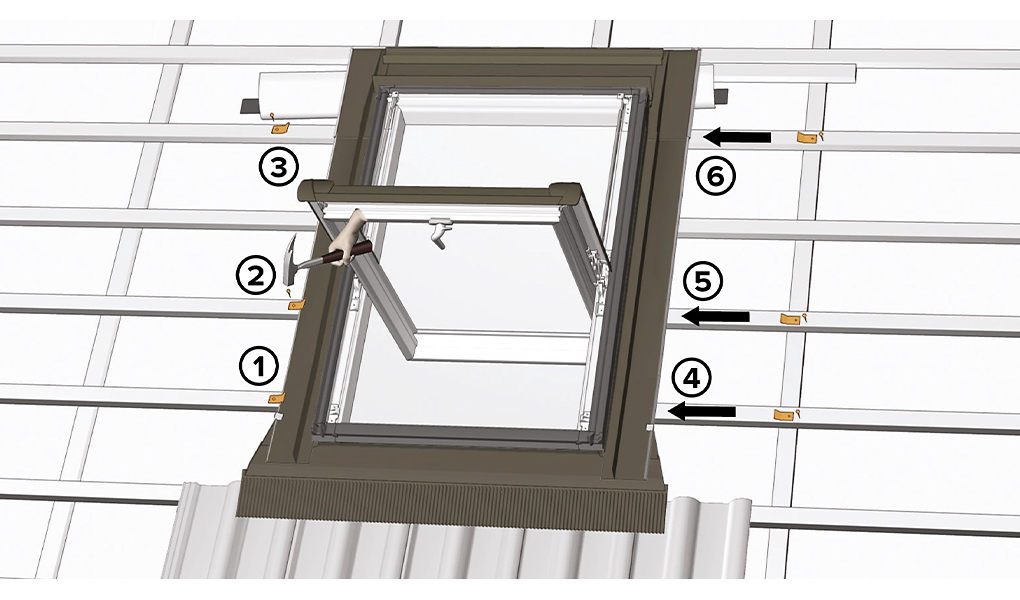
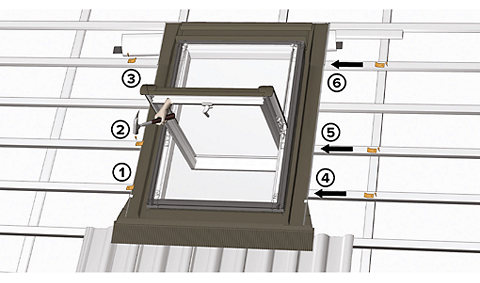
Step 4
Fasten the two side flashing sections to the battens with the six clips and nails provided with the flashing kit. Use a hammer to fix the clips to the battens.

Step 5
Use your hand to press and mould the apron of the flashing to the contours of the tiles.


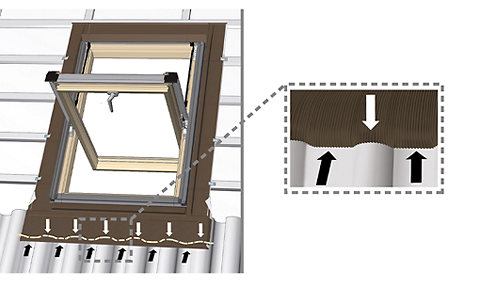
Step 6
Replace the remaining tiles around the window. You might need to use an angle grinder or a tile / brick hammer to adjust any tiles to ensure the correct gap above the top flashing, as per the flashing kit instruction manual.
Don’t forget to wear rigger gloves and safety goggles when cutting or chamfering the tiles to fit.


Step 7
Top-up with insulation any gaps around the window frame before boarding up the inside of the loft with plasterboard and decorating as required.