Installing a Site roof window: Stage 3
How to install the roof window
This series of guides will take you through the process of installing a Site roof window on high profile clay tiles using a Site flashing kit designed for these tiles.


Each section is detailed to ensure you get all the information you’ll need to help you complete the job.
The project has been split in to several articles to take you through each stage of the process in manageable chunks.
Stage 1:
Stage 2:
Stage 3:
Stage 4:
With the roof prepared and the window frame separated and prepared, you’re now ready to install the window frame and re-fit the window sash.
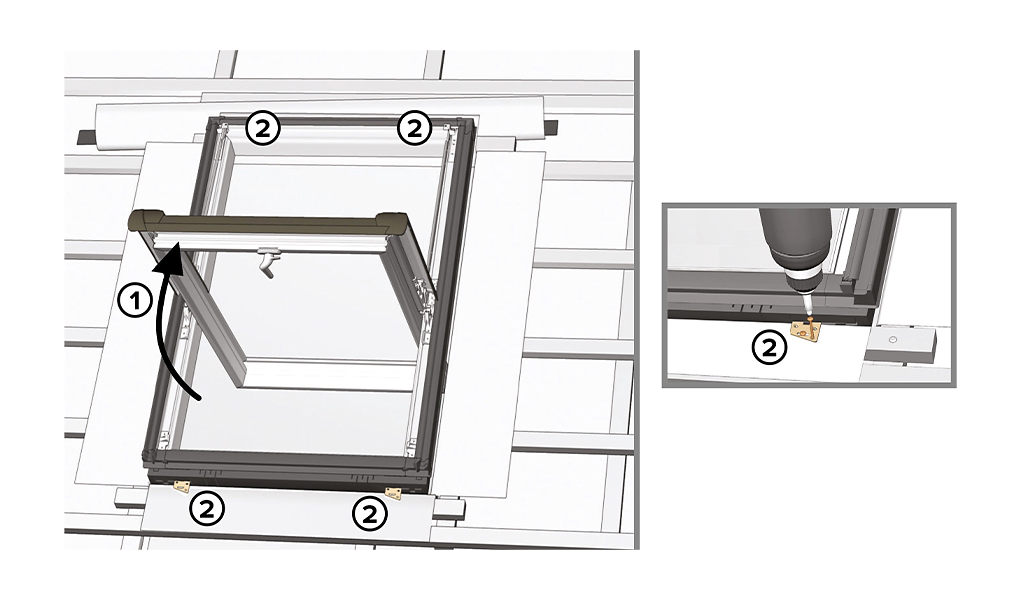
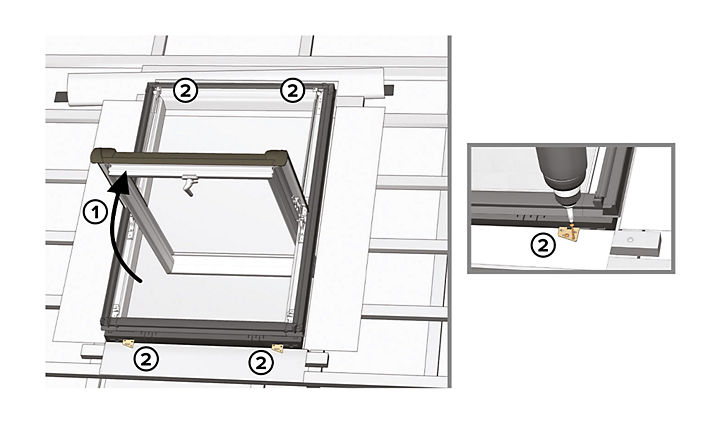
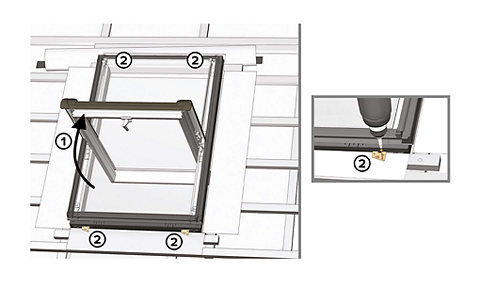
Step 1
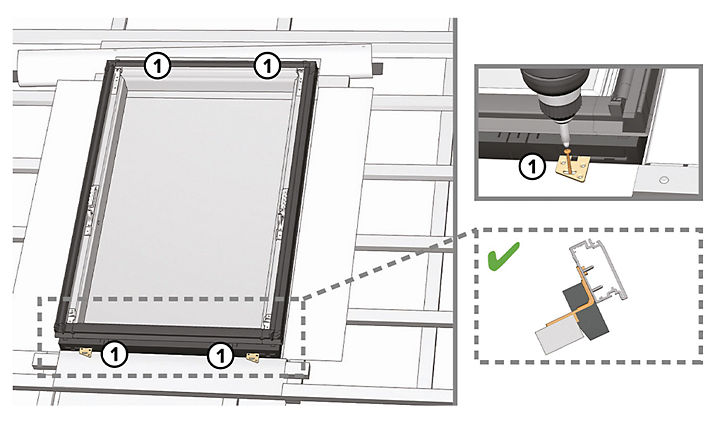
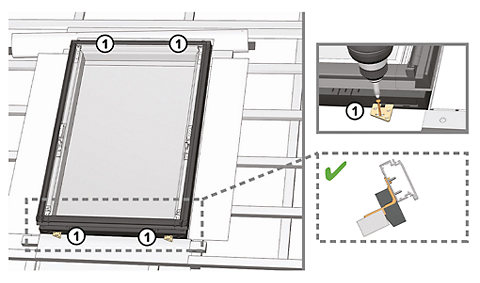
With the support of a helper, carefully lift the window frame through the opening and position it flat onto the framing battens. Hold the window firmly in place whilst you check it is central on the frame, square and level on the timber frame.
The brackets should fit squarely onto the framing battens. Once you have achieved the correct positioning, screw down the four brackets but only use one screw into each bracket for now. The screws are provided with the window.
Step 2
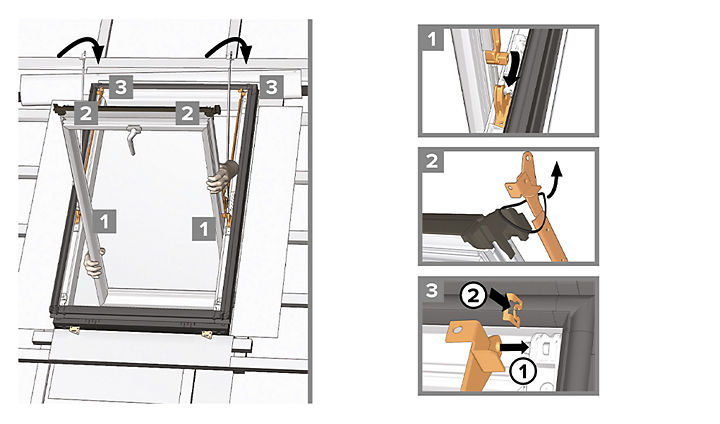
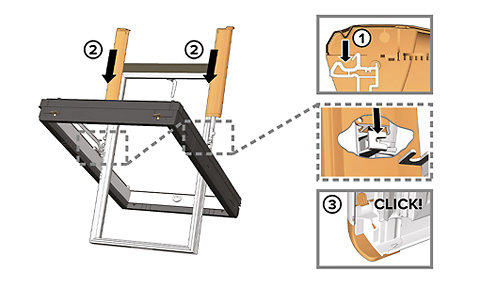
Carefully mount the sash back into its frame hinges. It will feel like the sash is placed upside down and back to front, but that’s the way it is initially engaged. Once it is securely engaged within both hinges, remove the retaining bands from the metal arms.
Next, clip the two arms into the top corners of the window frame. The plates are then clipped on to keep the arms in position within the frame.


Step 3:
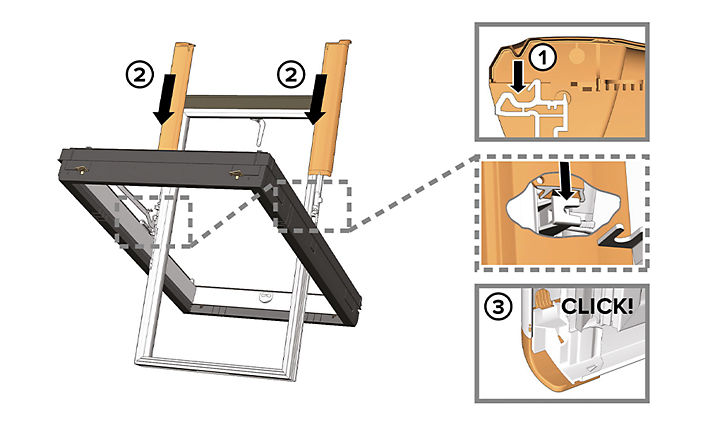
It’s now time to refit the aluminium covers we removed from the frame at the beginning of the project. Slide the covers back onto the frame one at a time. You’ll know they are fitted correctly when you hear a ‘click’.

Step 4
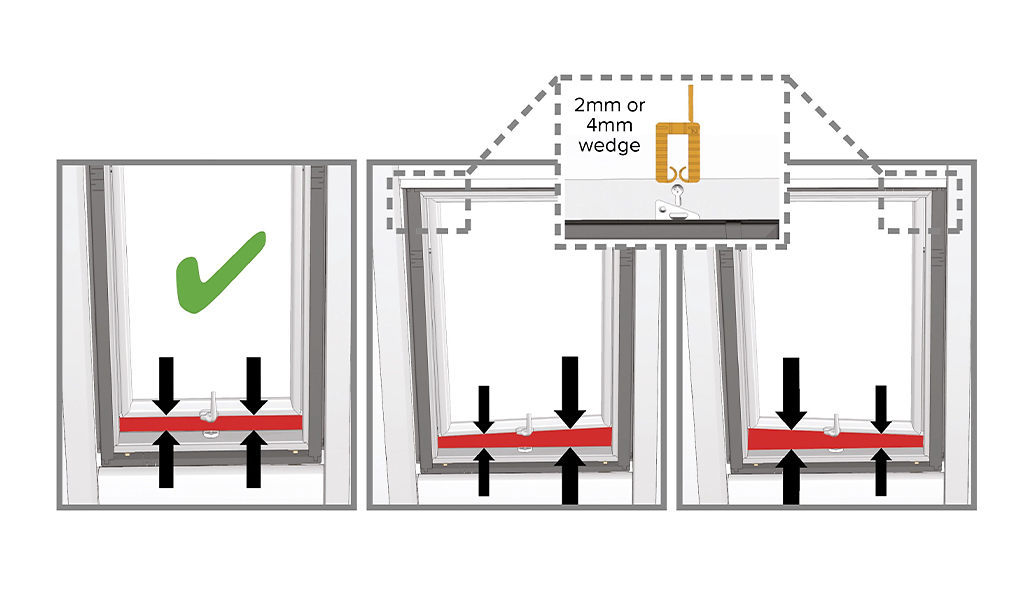
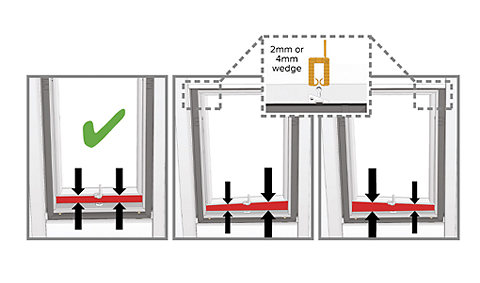
With the window in a slightly opened position, check if the horizontal gap, between the bottom of the sash and frame, is parallel.
If the sash is not parallel within the frame, fit a 2mm or 4mm wedge (supplied with the window) to either of the two top brackets to set the correct gap.
To fit wedges, unscrew the appropriate bracket at the top of the window and slide in the wedge as shown. Check the alignment again and screw the bracket back down once the gap is parallel.

Step 5
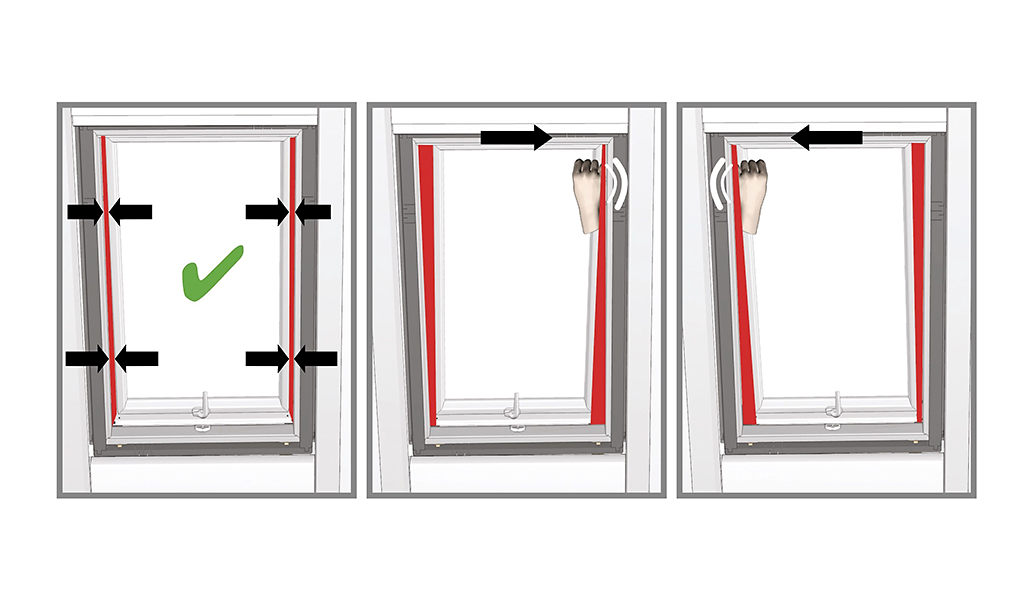
With the window slightly open, check the vertical gaps between the sash and frame. If it’s not parallel, use your hand to knock the top side-edges of the frame so the sash sits correctly within the frame. It may be necessary to adjust the external brackets to help with the alignment of the window.
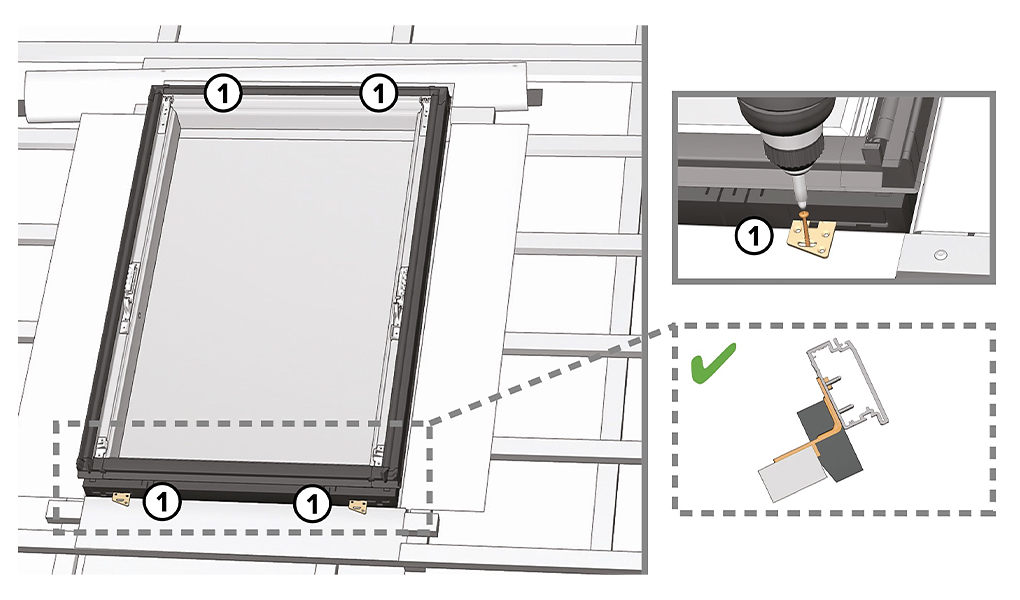
Step 6
Once you are satisfied with the alignment of the window and you have checked that it opens and closes smoothly, you can screw in the remaining screws into the four external corner brackets.