How to plan and build your handleless kitchen
The new era of kitchens
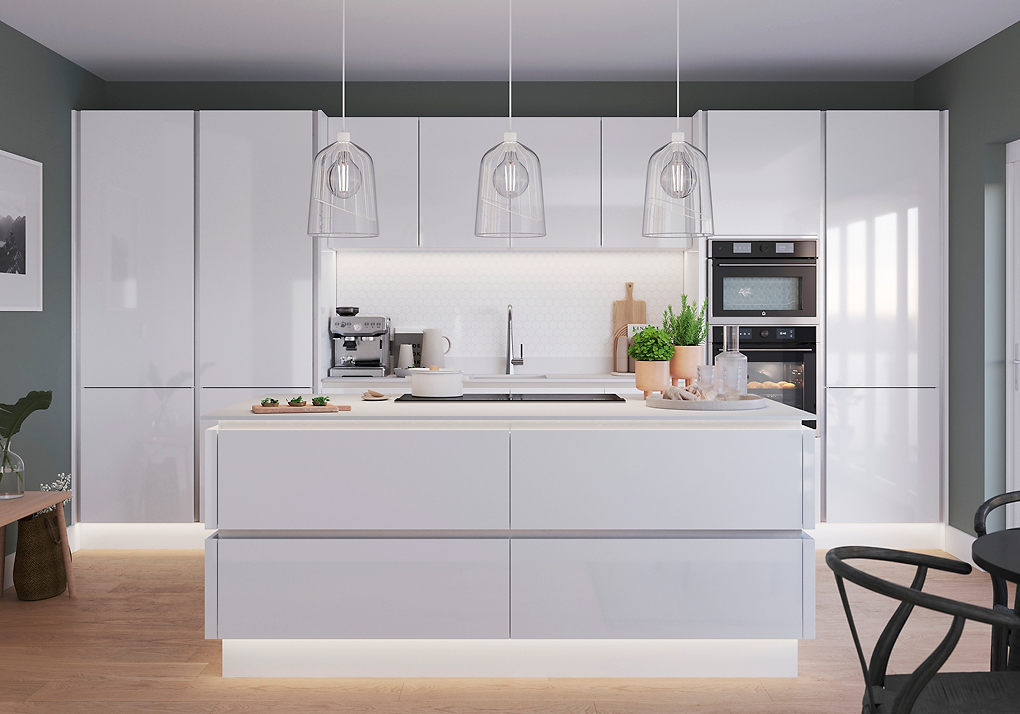
Ultra-sleek, minimalist kitchens aren’t just reserved for swish penthouses and interior design magazines. With our new Innovo range, it’s easier than ever to bring the elegant handleless look to your own home. Handleless kitchens are more than just a trend, they’re the next era of kitchens.
We’ve developed a new Caraway cabinet design and paired it with a clever rail system to create a stunning handleless look in your kitchen. Choose from three rail finishes, three door styles, and 11 door finishes. No matter your taste or preference, you can create the perfect combination to match your style.


In this article, we’ll show you the key things you need to consider when planning your handleless kitchen, as well as how to install a worktop and drawer rail. For more in-depth information on installing your handleless kitchen, please have a look at our Caraway Innovo handleless installation guide which you should read alongside our GoodHome kitchens installation guide.
There’s a lot to cover, so let’s get started…
- What are the benefits of a handleless kitchen?
- How to plan your handleless kitchen
- Which door options and styles can I choose from?
- Which rail effects can I choose from?
- Which kitchen appliances are compatible with handleless kitchens?
- Fittings and accessories explained
- Things to note before you start installation
- How to fit a worktop rail
- How to fit a drawer rail


↵
10 reasons why you should choose a handleless kitchen
Handleless kitchens bring a whole host of advantages over classic kitchens with handles, check out the list below and see for yourself…
- A handleless kitchen is renowned for its ultra-minimal, modern feel.
- Clean and uninterrupted lines for a sleek and streamlined finish.
- Easier to keep clean than a conventional kitchen, as there are less grooves for dirt and grime to collect.
- No protruding parts – making it a safer option if you have young children.
- This design is able to accommodate any taste and its effortlessly stylish look provides an uncluttered appearance in your kitchen.
- This is fast becoming a new kitchen look rather than a trend.
- Smoother surfaces and minimalism provide a blank canvas for accessorising.
- There are three rail systems for every door option.


How to plan your handleless kitchen
Our Caraway Innovo range is special as it uses a new dedicated cabinet together with a clever rail system to create a sleek, handleless look. There are some important differences which you’ll find useful to know when planning your kitchen.
- Layout and planning considerations
- The range explained
- Which door options and styles can I choose from?
- Which rail effects can I choose from?
- Which kitchen appliances are compatible with handleless kitchens?
- Fittings and accessories explained
Layout and planning considerations
Things to consider:
- Caraway Innovo handleless base cabinets are 34mm taller than base standard cabinets to work with the rail without the need for fiddly spacers for worktops.
- Allow a 30 mm gap on each side of a standard or tall larder/appliance housing unit to allow room to fit the rails.
- All wall cabinets come with a pre-fitted integrated handleless rail built into the bottom of the cabinet for easy opening.
- All base cabinets and larder or appliance housing units will come pre-notched, ready to fit rails.
- For base end panels, allow a 30mm gap in your design if a floating one is required.
The range explained
Everything you need to understand our handleless rail system, where they go and the various fittings and accessories that come with it.


Worktop rail
Length: 300cm (to cut to size)
Use this rail with base cabinets. You will also need cabinet fitting brackets.

Drawer rail
Length: 300cm (to cut to size)
Use this rail with base drawer cabinets. You will also need cabinet fitting brackets.

Vertical end rail
Length: 201cm (pre-cut)
219cm (pre-cut)
Use this rail between standard or tall larder/appliance housings and clad on panels. Fitting screws included. A 30mm wide spacer but also be used with this rail at the back of the cabinet to ensure the cabinet is spaced equally front and back.

Vertical middle rail
Length: 201cm (pre-cut)
219cm (pre-cut)
Use this rail between standard or tall larder/appliance housings. Fitting screws included. A 30mm wide spacer must also be used with this rail at the back of the cabinet to ensure the cabinet is spaced equally front and back.

Worktop rail end cap
These end caps are used at the end of rails to cover the cabinet cut out. Remember, when cutting worktop and drawer rails to length, be sure to allow 2mm on each side for end caps.

Drawer rail end cap
These end caps are used at the end of rails to cover the cabinet cut out. Remember, when cutting worktop and drawer rails to length, be sure to allow 2 mm on each side for end caps.

Vertical rail end caps
These end caps are used at the end of vertical rails for a neat finish.

Tall oven housing filler
Use this filler rail for built-in ovens in tall housing units. It fills any voids left behind for a seamless finish. It is colour matched to the rails.

Built under oven housing
The handleless look is created by lowering the oven rail and using 2 x 5.8 cm filler panels. One continues in line with the top of the door and the other sits beneath the oven.

Wall and bridging cabinets
All wall and bridging cabinets come with a pre-fitted integrated handless rail. The handle is finished in brushed aluminium but this is not visible when the door is closed.

Cabinet spacers
This spacer is used to support a floating end panel or to space a bank of larder units apart in line with the vertical rail requirements.

Batten
This 25 mm thick batten is used behind base, tall larder, appliance housings to ensure the cabinets are spaced enough away from the wall.


Artemisia shaker
There are three styles to choose from:


Alisma slab
There are two styles to choose from:


Brushed steel effect rail
If you’re after a cohesive look, the brushed steel effect rail will match chrome items in the kitchen, such as your sink, appliances, and taps. Brushed steel pairs nicely with gloss finish doors in white, light grey and anthracite tones. Or for a more contemporary look, it will create a stylish contrast against matt doors with light or dark tones.


Matt black rail
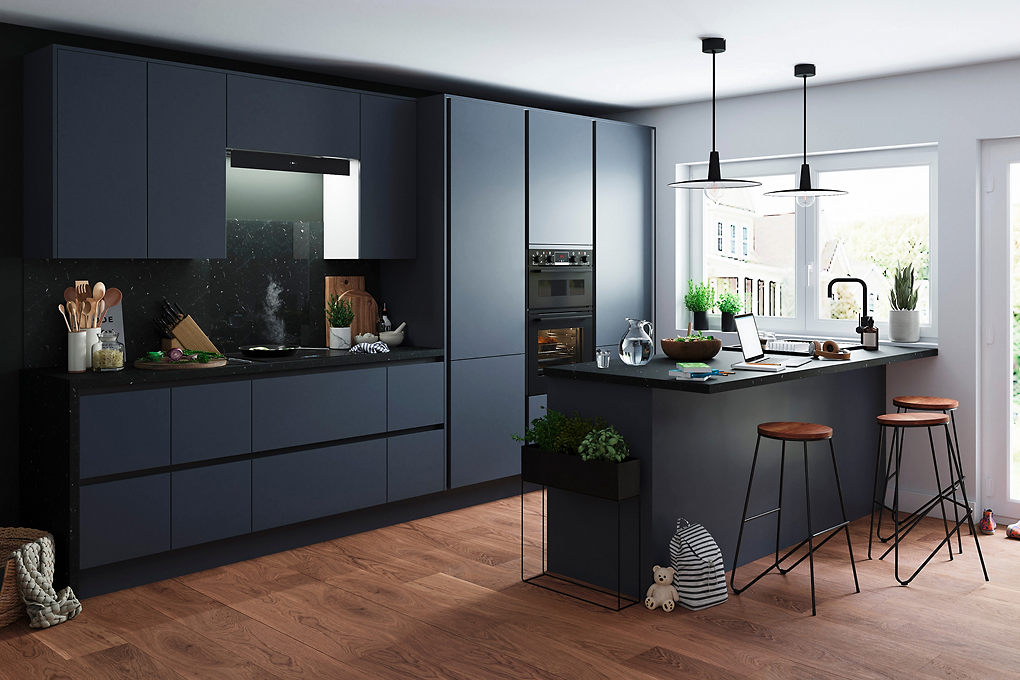
Make a statement in your kitchen with a matt black rail. A black rail on a white door will look super stylish and contemporary. Or pair with deep colours, such as blues and greens to accentuate the modernity and high-quality look of the kitchen. Black won’t clash with other metal finishes, so you can still incorporate chrome, brushed brass, or copper as accents in your kitchen.


Copper effect rail
If you want a kitchen that really stands out from the rest, choose a copper effect handleless rail. Pair with a navy blue or anthracite kitchen for a dramatic look. Or for a clean and modern look, combine with a white or light grey kitchen. Bring the whole look together with a range of copper accessories, such as taps, pendant lights, and kitchen splashbacks.
Which kitchen appliances are compatible with handleless kitchens?


Hobs
All GoodHome Caraway Innovo handleless kitchens are compatible with all our GoodHome Gas, ceramic and induction hobs. It’s very important to make sure you install a batten between your kitchen wall and base cabinets or tall housing units (not required for wall units) for safety purposes to ensure that manufacturers installation instructions are met.


Chimney cooker hoods
Fully compatible with Caraway Innovo kitchens as no cabinet is required for these types of cooker hood.


Glass angled hoods
Fully compatible with Caraway Innovo kitchens as no cabinet is required for these types of cooker hood.
Integrated into cabinetry
Cooker hoods integrated into cabinetry - to use this hood with Caraway Innovo kitchens, it must be fitted in a standard caraway cabinet with push to open mechanisms. This is due to either the handleless rail not being able to be accessed or the rail able to be installed with the relevant cooker hood.


1. Integrated built-in dishwashers all work with Caraway Innovo. The dishwasher still sits on the floor, however the cabinets either side are 34mm taller to allow for the rail to run along the top of the dishwasher under the worktop. The door is slightly taller, so it aligns to the doors either side whilst still allowing easy access to the controls. The plinth is cut out as standard.
2. 60 cm integrated dishwashers can also be fitted with the dishwasher plate to create a drawer effect. This gives the impression the drawer line continues along the kitchen. The two handleless 60 cm drawer fronts are effectively joined by the dishwasher plate (available in all 3 colours). The door is then fitted in the same way as a highline door. This is not suitable for a slimline dishwasher. When using the dishwasher plate, it is recommended that drawer rail end caps are used on the drawer rail on the adjacent cabinets for an improved aesthetic finish.
3. Integrated built in washing machines, washers, dryers, and tumble dryers all work with Caraway Innovo, the rail simply continues across the span of the appliance so when the door is closed it looks like there is no integrated appliance. The door is opened by putting hands into the rail and opening the door. The door is attached to the machine in the usual way and the plinth still runs along as normal. If using 2 drawer fronts then a 60cm dishwasher plate is required.
Integrated built in / built under cooling appliances
1. Built in cooling appliances will fit into the Caraway Innovo larder cabinet in the same way they fit into the standard caraway cabinets. The vertical rail in the housing allows you to get your hand behind the kitchen door that opens not only the door but the appliance behind it. The same hinges for the door are used and the splits can be 50/50 and 70/30 as per caraway cabinets. Full height integrated fridges and freezers are also able to be used using door straps to secure the doors to each other. All of the existing combinations shown in the kitchen planning tool and the price guide still work.
2. Built under fridges and freezers fit as normal and still sit on the floor, the cabinets either side are 34mm taller to allow for the rail. The door fits to the appliance in the same way and the rail runs under the worktop.
Fittings and accessories explained
Worktop rail
To install the horizonal worktop rail, the following fixings and accessories are available.
Worktop rail
Length: 300cm (to cut to size)
This worktop rail sits beneath the worktop. It lets you get your hand behind the door to open it.
Rail to cabinet fixing bracket
These brackets are used to secure the worktop rail to the cabinet. They push fit into the side panel of the cabinet and then into the the back of the rail. They then simply clip and fit together to hold the rail in place in the cut out of the cabinet. Includes 2 per pack.
L shape rail to cabinet fixing bracket
This L shape bracket is used to secure the worktop rail to a wide base cabinet (80cm and 100cm), or L shape base cabinets. Includes 2 per pack.
Straight rail connector
This connector is used to join 2 rails together. Includes 1 per pack plus screws.
Worktop rail - inner corner joint
This accessory is used to join two rails when they meet in an internal corner. Fixing is not visible when installed as it sits behind the corner post. Remember when cutting rail and using an end cap the rail length needs to be extended by 9mm.
Worktop rail - outer corner joint
This accessory is used at the end of a run of base cabinets where the rail continues around the corner with a "floating" end panel. Remember when cutting rail and using an end cap the rail length needs to be extended by 9mm.
Internal worktop rail end caps
These caps fit into a worktop rail to end the run of the rail when it runs into a clad on panel. Remember when cutting rail and using an end cap the rail length needs to be reduced by 2mm.
Drawer rail
Length: 300cm (to cut to size)
The drawer rail is used with the drawer cabinet and is the main rail that sits between a set of drawers running parallel to the worktop. It lets you get your hand behind the drawers to open it.
You’ll need a rail to cabinet fixing bracket to fix this to the cabinet.
Internal drawer rail end caps
These caps fit into a drawer rail to end the run of the rail when it runs into a clad on panel. Remember when cutting rail and using an end cap the rail length needs to be reduced by 2mm.
Drawer rail - outer corner joint
This accessory is used at the end of a run of drawers where the rail continues around the corner with “floating” end panels.
Vertical mid rail
Length: 201cm (pre-cut)
219cm (pre-cut)
This vertical rail sits between standard or tall larder/appliance housings, letting you open the door.
Vertical end rail
Length: 201cm (pre-cut)
219cm (pre-cut)
This vertical rail sits between standard or tall larder/appliance housings and clad on panels, letting you open the door.
Vertical rail end caps
These caps are used at the top and bottom of a vertical rail.
To use these between larder or appliance housing units and a clad on panel, you simply snap the end caps to fit them.
If you need help with any cabinet modifications, we recommend you contact a trade professional who is confident using a router and plunge saw. For more information, please visit our NeedHelp page.
Before you start
Measuring and cutting your rails
Some rails come in standard lengths which you need to cut down to fit your cabinet run. It’s always a good idea to double check any measurements before you start cutting them to avoid mistakes.
Working with sharp edges can be risky business. So, when cutting rails to length, always be aware of sharp edges at the ends. Consider wearing gloves and make sure you always use appropriate aluminium cutting blades for the task.
Fitting a batten
When fitting a Caraway Innovo handleless kitchen, it is extremely important to install a batten to the wall for safety purposes to allow the manufacturers appliance safety installation distance to be met. This is a vital safety step that ensures all base and larder/appliance housing units are pulled away from the wall by 25 mm, ensuring the kitchen is compliant with appliance regulations.


Step 1
Fix the 25 mm thick batten to the wall using suitable wall fixings. The top of the batten needs to be flush with the top of the base unit, which is approximately 875 mm off the floor depending on the leg’s adjustment. This is to ensure sufficient spacing between the cabinet and the wall.
For a larder/appliance housing unit, a second batten is needed at the top of the cabinet. The exact placement of that second batten varies depending on the type of unit, please refer to the instruction manual for more visual guidance.
Step 2
Position all units, level, and join. Fix the units to the battens using angle brackets. Note: Wall units do not require battens.
Don’t forget that the base cabinets must be exactly level and fixed to the wall before you can start installing the rails. You’ll also want to measure up the length of the cabinet run and cut the rails to size according to your measurements.
Choosing end panels
There are 3 different end panel options to choose from:


Clad on end panel
Clad on end panels are created in the same way with the only additional requirement is a worktop or drawer rail end cap to add onto the rail where it meets the clad on panel.
Fitting a clad on end panel on a Caraway Innovo handleless cabinet is exactly the same as on a standard caraway cabinet. The main steps are about measuring where you need to cut your panel at the rear of the unit and along the top. Please refer to the step-by-step instruction manual.


Floating end panel with rail
Floating end panels can only be installed onto the side of a cabinet, therefore cannot be installed onto an appliance.
Floating end panels are created using an external corner post, outer worktop corner joint, clad on/tall housing spacers, floating clad on rail to cabinet fixing bracket, worktop rail and external floating end panel. When creating a peninsula unit or island a second external corner post and outer worktop corner joint are required.
Spacers (30 mm) are also required to ensure the floating end panel is spaced equally at the front and the back. When planning and installing a floating end panel it’s important to allow 30mm additional space between the panel and cabinet.


Floating drawer end panel
Floating end panels are created using an external corner post, outer worktop corner joint, outer drawer corner joint, clad on/tall housing spacers, two floating clad on rail to cabinet fixings, worktop rail, drawer rail, and external floating drawer end panels. When creating a peninsula unit or island a second external drawer corner post and outer worktop and drawer corner joint are required.
External corner posts are needed while fitting a floating end panel and a floating drawer end panel.


For more information about fitting a floating end panel, please refer to the step-by-step instruction manual.
Larder and appliance housings
Larder and appliance housing units for Caraway Innovo are created the same way as the standard caraway range (in both standard and tall) with a shelf pack and end panels. For Caraway Innovo the cabinet end panels for these cabinets are not as deep as regular larder or appliance housing panels so that the vertical rails can be snugly in the front of the end panel allowing for easy opening of any cabinet.
Spacers (30 mm) are also required to ensure the housings are spaced equally at the front and the back. When planning and installing any larder or appliance housing units it’s important to allow 30mm additional space on each side of the cabinet to perfectly fit the rail. The rail is installed onto the cabinet by screwing through the inside of the cabinet into the rail but please refer to the installation manual for full details of how the rail is installed onto the cabinet.


Fitting end caps
There are three types of end caps in the Caraway Innovo handleless system: one for the worktop rail, one for the drawer rail, and one for the vertical rail for standard or tall larders or appliance housing.

Worktop rail end cap
2 per pack (1 x L/H + 1 x R/H)

Drawer rail end cap
2 per pack (1 x L/H + 1 x R/H)

Vertical rail end cap
The vertical end cap is used for both the middle and the end rails and needs to be snapped to fit. 2 per pack for top and bottom of vertical rails.


Step 2
Next fit brackets to the rail as shown, sliding them into position.
Step 3
Align the rail with the top and front edge of the cabinets and move the brackets into their final positions.
Step 4
Fix in place. You’ll find pre-drilled holes in the cabinet to fix the brackets using the screws included.
Step 5
Take your drawer end cap and simply clip it into place


For corner or extra wide cabinets (i.e. 80 cm +) and L shape corner cabinet supporting brackets are required.


Fitting an inner corner joint with a worktop rail
Step 1
Take your rail and cut it to length, using the internal corner joint to join. Remember to allow an additional 7.5 mm for the corner joint itself.


For both a blind corner and L shape cabinet, the rail and corner joint are attached to the cabinet. Each corner joint is supplied with an angled wedge to fill the gap behind the corner post.
Fitting an outer corner joint with a worktop rail


Step 1
Carefully measure and cut the return section of the worktop rail. Remember to allow an additional 4 mm for the corner joint itself. Then fit the brackets to the rails in their approximate positions.
Then fit the brackets to the rails in their approximate positions.
Step 2
Take the rail for the return section and fit the corner piece to it. Then position it on the side of the cabinet whilst connecting the corner piece into the front rail.


How to fit a drawer rail
Step 1
Take your rail and cut it to size, fitting the brackets to the approximate positions along its length For end caps, allow 2 mm at each rail end. For an external corner return, the front worktop rail will need an additional 4 mm added to the length.
Step 2
Position the rail with the cabinet cut out and align it with the front edge.
Step 3
Next move the brackets along the rail to their final locations against the cabinet side panels.
Step 4
Locate brackets in line with pre-drilled holes in cabinets and secure brackets to the cabinets using the screws provided.
Step 5
Take your drawer end cap and simply clip it into place. It’s useful to know that brackets are not needed in a run of cabinets.


Fitting an outer corner joint with a drawer rail
Step 1
Carefully measure and cut the return section of the drawer rail. Remember to allow an additional 4 mm for the corner joint itself.
Step 2
Next take the brackets and fit to the back of the rail. Use screws to position and secure.
Step 3
Take the corner joint and fit to the front end of the return rail, before connecting to the other section of rail.


For more guidance and advice on installing your kitchen please refer to our Caraway Innovo handleless installation guide and ensure that you read it alongside our GoodHome kitchen installation guide. Don’t fancy doing it yourself? Find out more about our installation service, or find a reliable tradesperson through NeedHelp.