How to plan decking
Kickstart your decking project
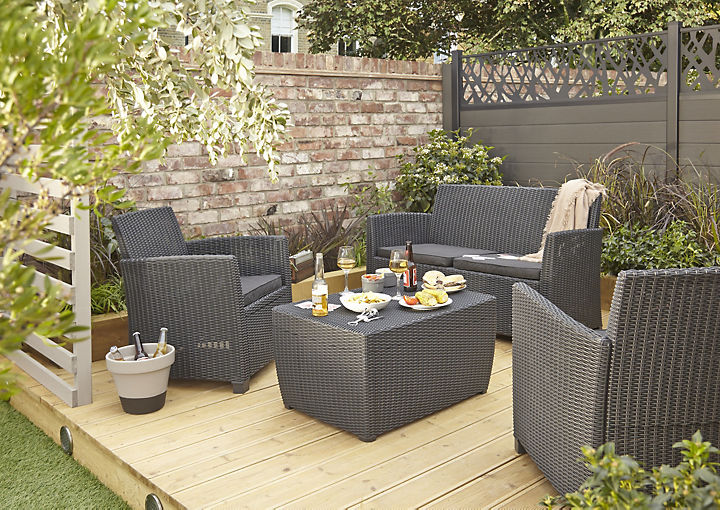
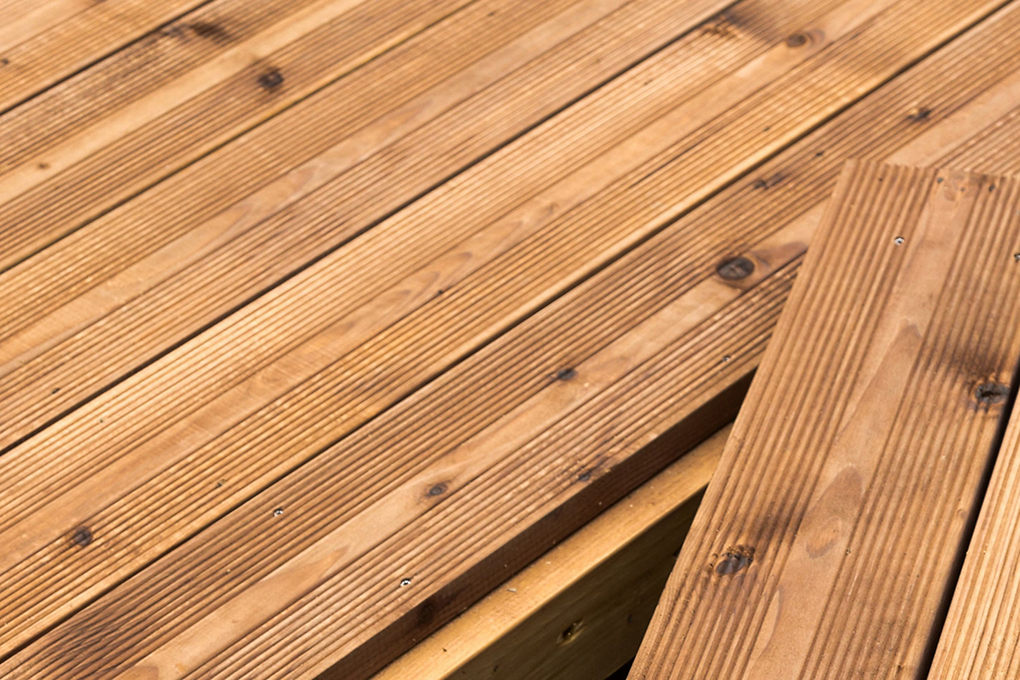
A deck is essentially an open-air extension of your living space. Free-standing or attached to a house wall, decking creates a space that's ideal for outdoor entertaining, as a play area for the kids or simply somewhere to relax outdoors. It also offers an inspired solution to common garden problems such as slopes, or spots where the grass won't grow.
Decking is flexible, allowing you to extend, or update the features over time, as well as allowing you to work around fixtures such as trees or posts that you cannot, or don’t want to, remove from the area.
And you don't need to be a carpenter to build a deck - a few power tools, a basic tool kit and some woodworking skills are needed, so in most instances you can undertake the work yourself. Just be sure to plan carefully and check all your measurements, both at the planning stage and as you build. A second pair of hands will be useful too.
Interested in adding some decking to your outdoor space? Read on for our expert advice to help you kickstart your decking project.
Rent a cable avoidance tool (CAT) to check for any pipes or cables beneath the proposed decking area. If found, we suggest reconsidering your decking plans.
What do you want to use your decking for?
Are you looking to create a place to entertain and socialise? An area where your children can play without getting dirty? Or do you want decking for your hot tub or pool? Knowing what you want to use your decking for will determine everything from location to what type of deck boards you should choose.
Check out our buyer's guide to decking. This covers the different materials available and some of the extra accessories that you may or may not need, depending on your decking structure.
How big should your decked area be?
When it comes to the size of your deck, think about the size of your garden. How much of your space do you want to cover with decking? Perhaps you love the idea of decking as a low-maintenance alternative to a lawn. Or maybe you want it to complement and work with your other landscaping such as paving and turf, and so are looking to achieve a balance that doesn't overwhelm your space. If in doubt, go conservative when it comes to size – you can always extend at a later date.
Top tip - Recreate your socialising space
If you're looking to entertain on your decking, arrange your garden furniture in the space you're considering for decking. This will give you a rough idea of how much space you might need - and don't forget to allow room to move any chairs around.
Draw up a simple plan of your house and garden, and mark where you want to build your deck.
Where do you want to lay your decking?
If your decking is to trim another garden feature such as a hot tub or pool, then your location is already set. However, if you have your pick, there are a few things to think about when choosing your site:
- Is the ground level or does it have a noticeable slope? Level gardens offer the easiest conditions for laying decking. But even the most difficult or steep of slopes can work with decking.
- How close is the site to your house? Decking can work well both adjoining your home and further away from it. If you're looking to step out from your home onto the decking, there are few important extra considerations that must be made during installation, but we'll take you through those later during the laying process.
- How much sun does it get? The south-facing side of the house will offer the most sunshine, however if you're looking to avoid the sun, select a shady spot.
- What's the view from the site? Perhaps you have a particularly stunning view that you'd like to look on from your decking, or the rear of your house.
- How much privacy does the site afford? Does it offer you the privacy that you want from your neighbours and does it maintain their privacy from you?
- Do you have any existing features to work around? From trees to posts, there's no need to remove anything else from your space to accommodate your decking - simply work around them. And if it's a tree, it makes sense to research the species as some trees can be very fast growing and so might need much more room than you first anticipate.
What about planning permission and building regulations?
Building regulations, planning permission and local byelaws can be complicated, subject to change and vary from place to place. Because of that, we can't advise on these issues in detail.
We do recommend that you:
- Check with your Local Planning Authority about your project plans before you start
- Speak to any neighbours who may be affected by your decking. Objections from neighbours is the most common reason for planning refusal or restrictions imposed by the authorities. So make time to have a chat with them, explain your plans and listen to any concerns they might have before taking the next step.

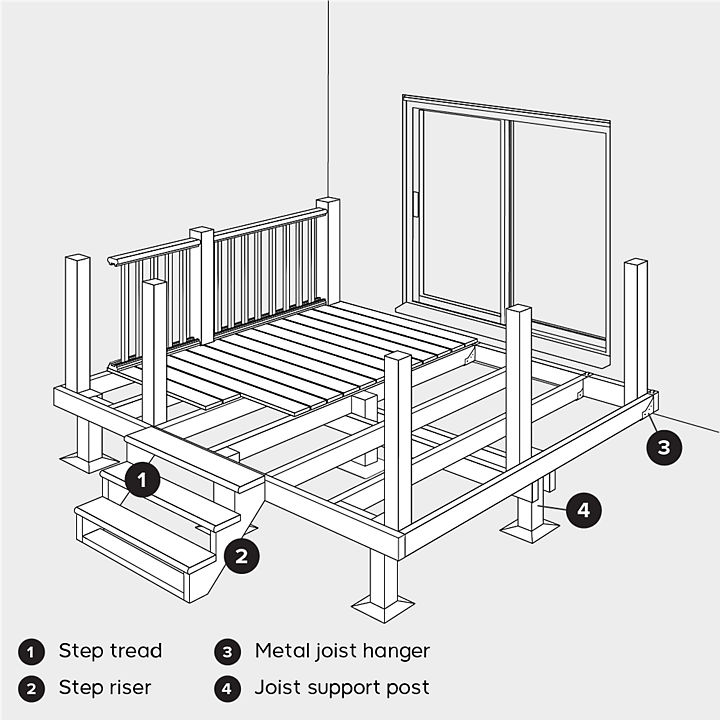
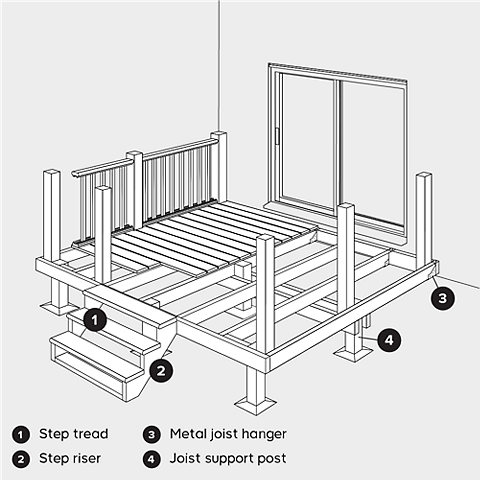
There are many options when it comes to decking structures. We're going to run through the three most popular ones:
- a simple, ground-level deck
- a ground-level deck with balustrade (also known as railings)
- a raised (or elevated) deck with balustrade and steps
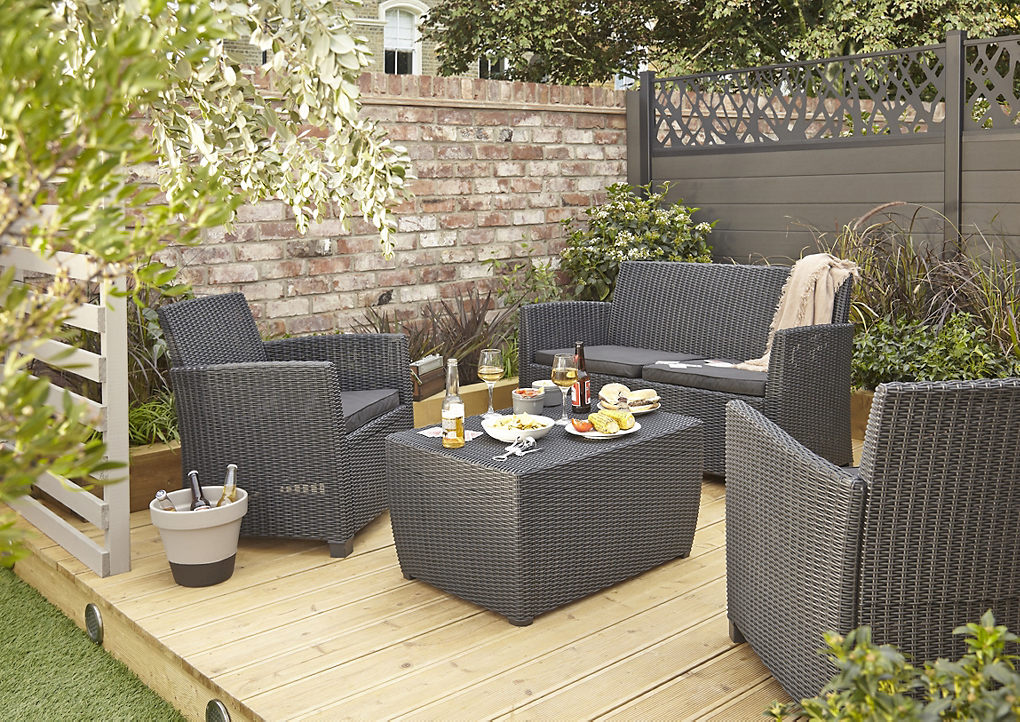
A simple, ground-level deck
- Ideal for ground that is level
- The most simple decking structure to construct and lay
- Can have footings or be laid directly onto the ground – it’s up to you
- Consider extra touches like decking lights
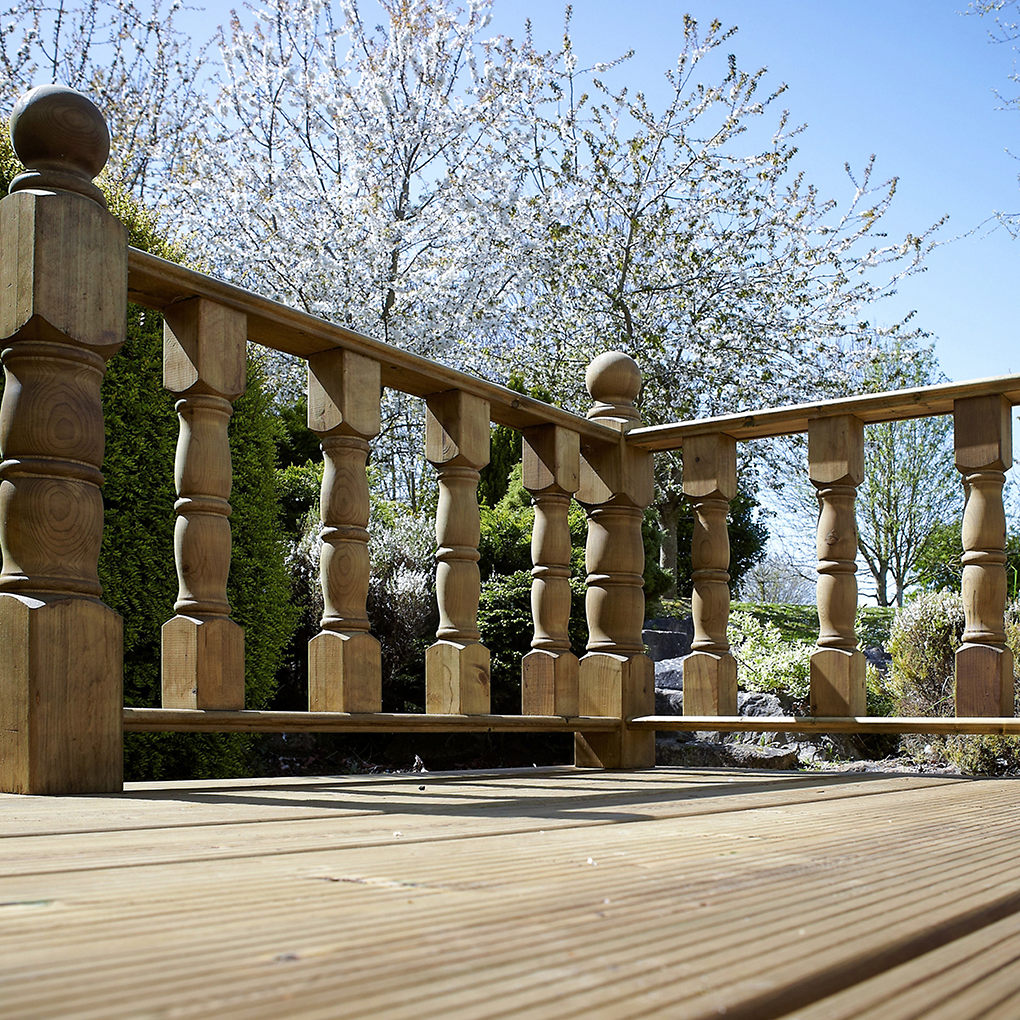
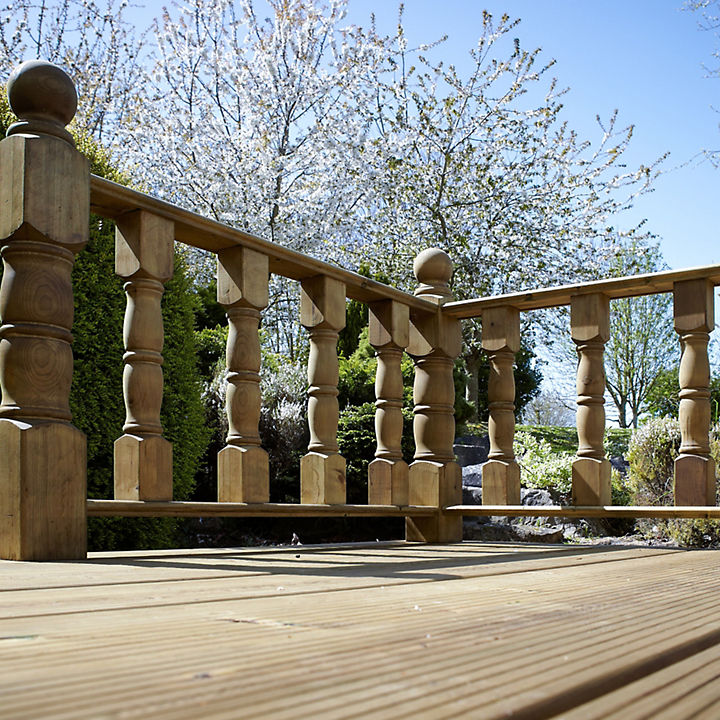
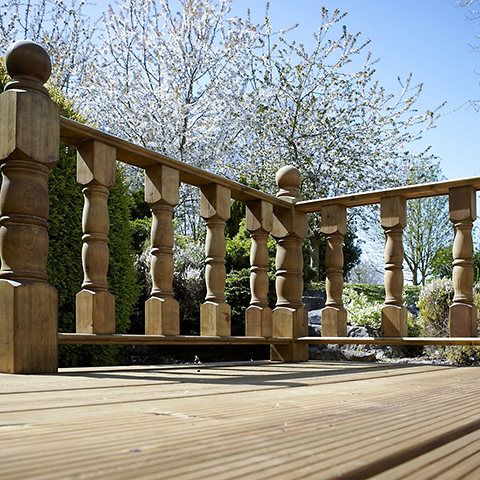
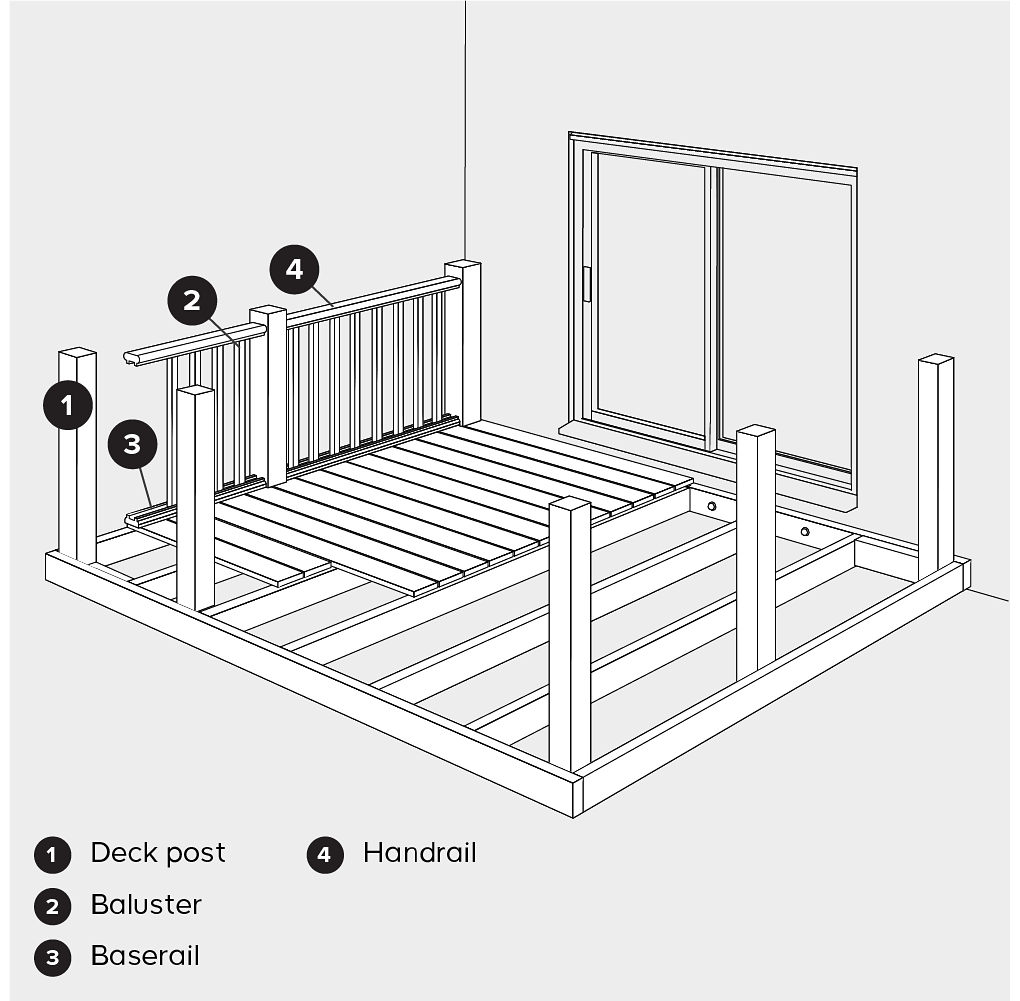
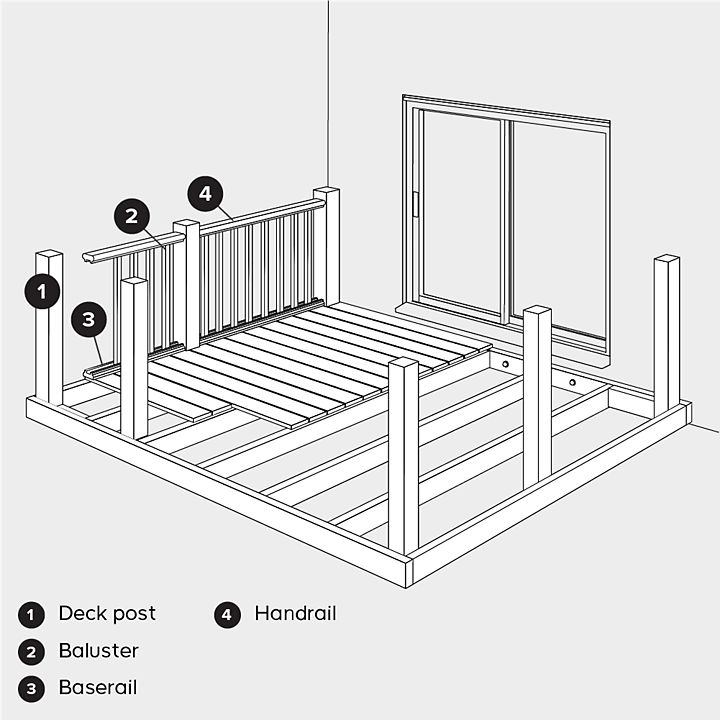
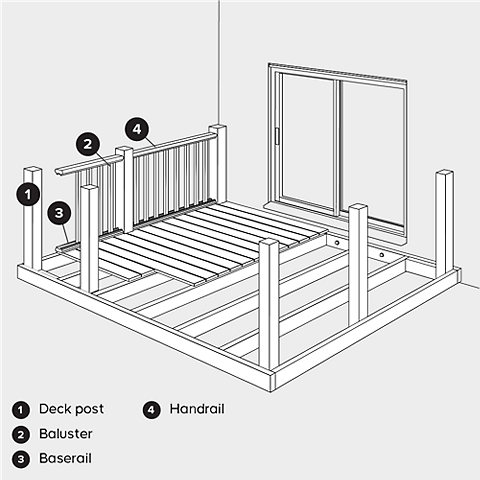
A ground-level deck with balustrade
- Creates an enclosed space - great if you want to be able to keep children and pets in one area
- Adds a decorative, as well as a practical, feature
- Balustrades (or railings) can be added during the initial building or added at a later date
- Consider adding a gate for security
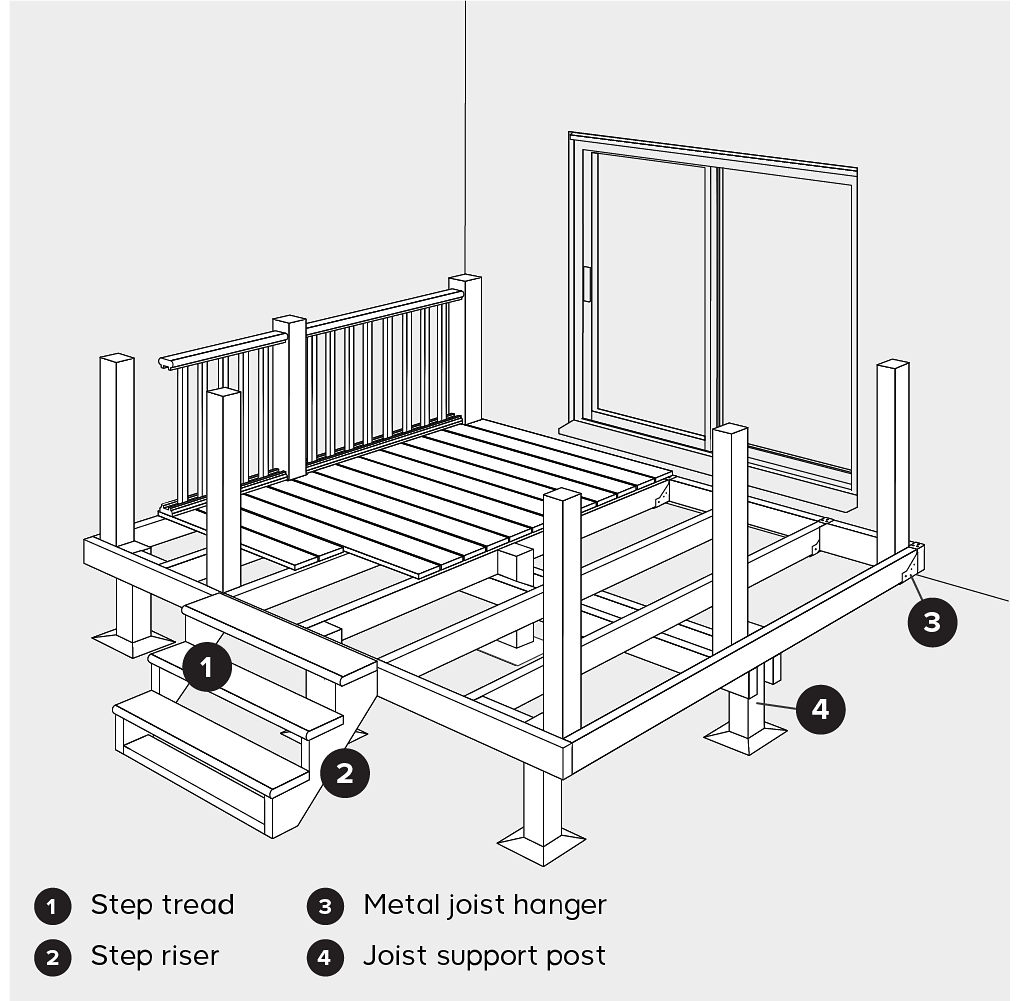
Raised deck with balustrade and steps
- Suits gardens on a slope
- A larger-scale project that takes longer to build
- The space underneath the structure can be used for extra storage
- Add a skirting panel as a decorative and practical finishing touch
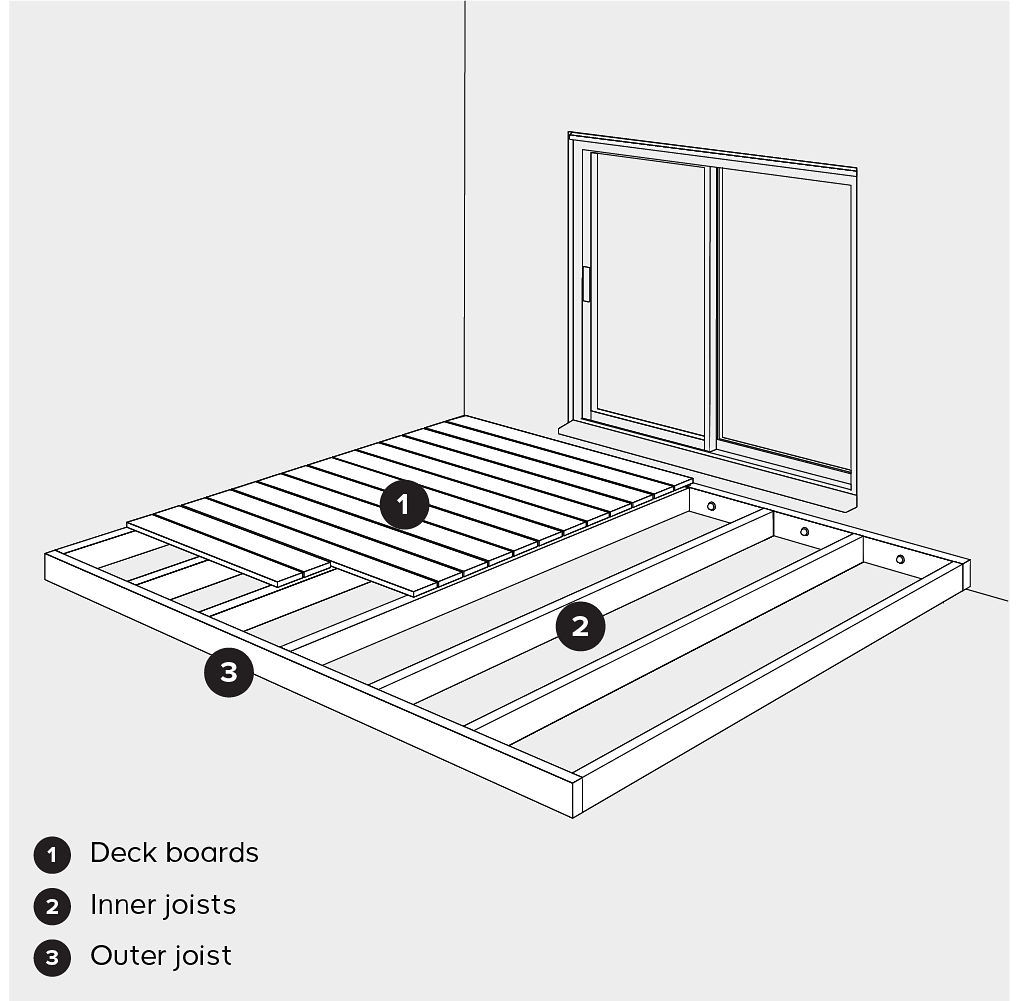
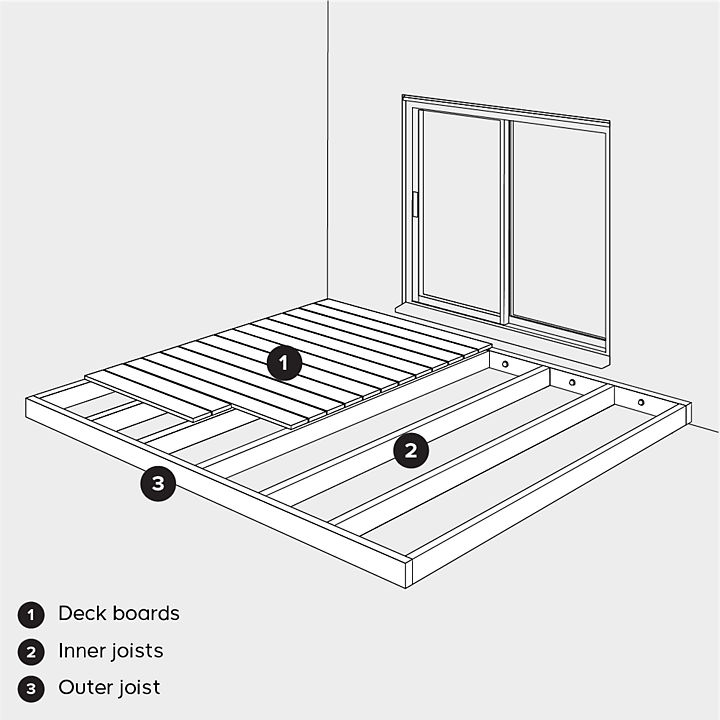
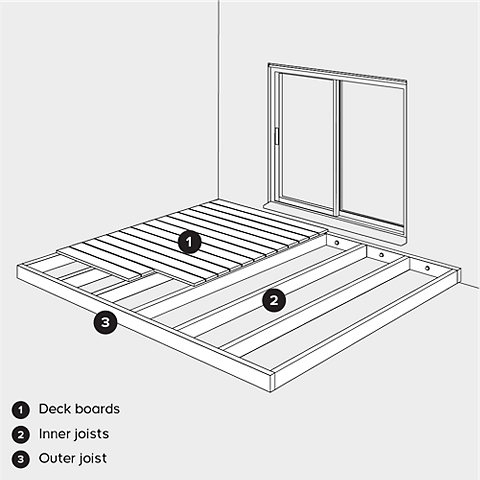
There are different ways of configuring your deck boards. Here are some of our favourite designs explained.
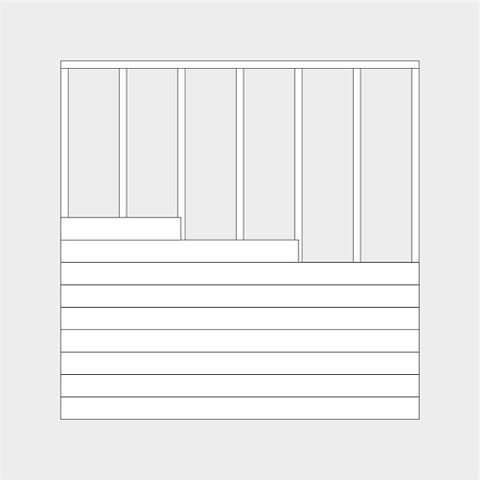
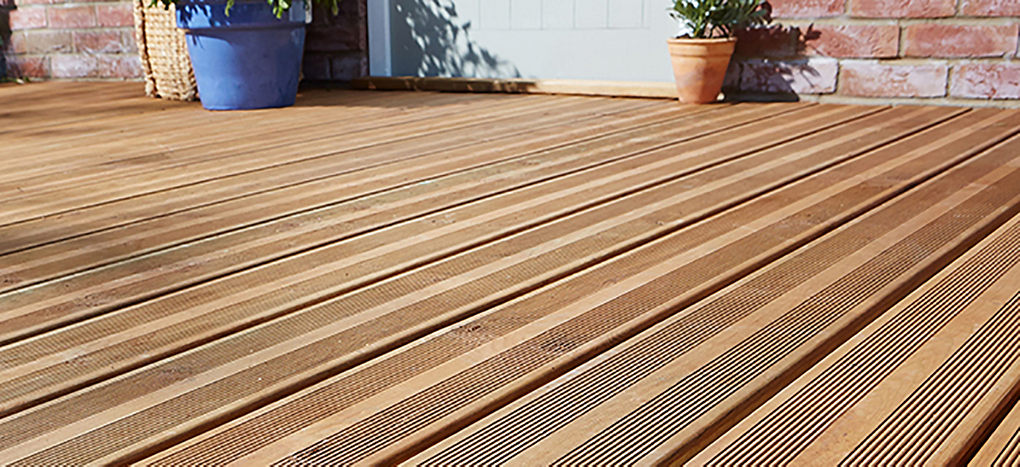
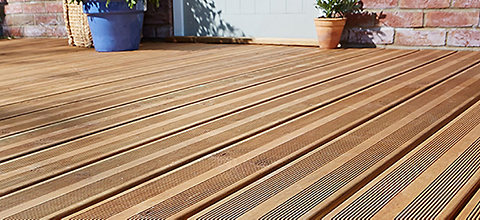
Horizontal deck boards
For the traditional decking look, choose to have your boards laid horizontally. For standard right-angled timber decking, measure a maximum of 450mm between the centre of one supporting joist and the centre of the next.
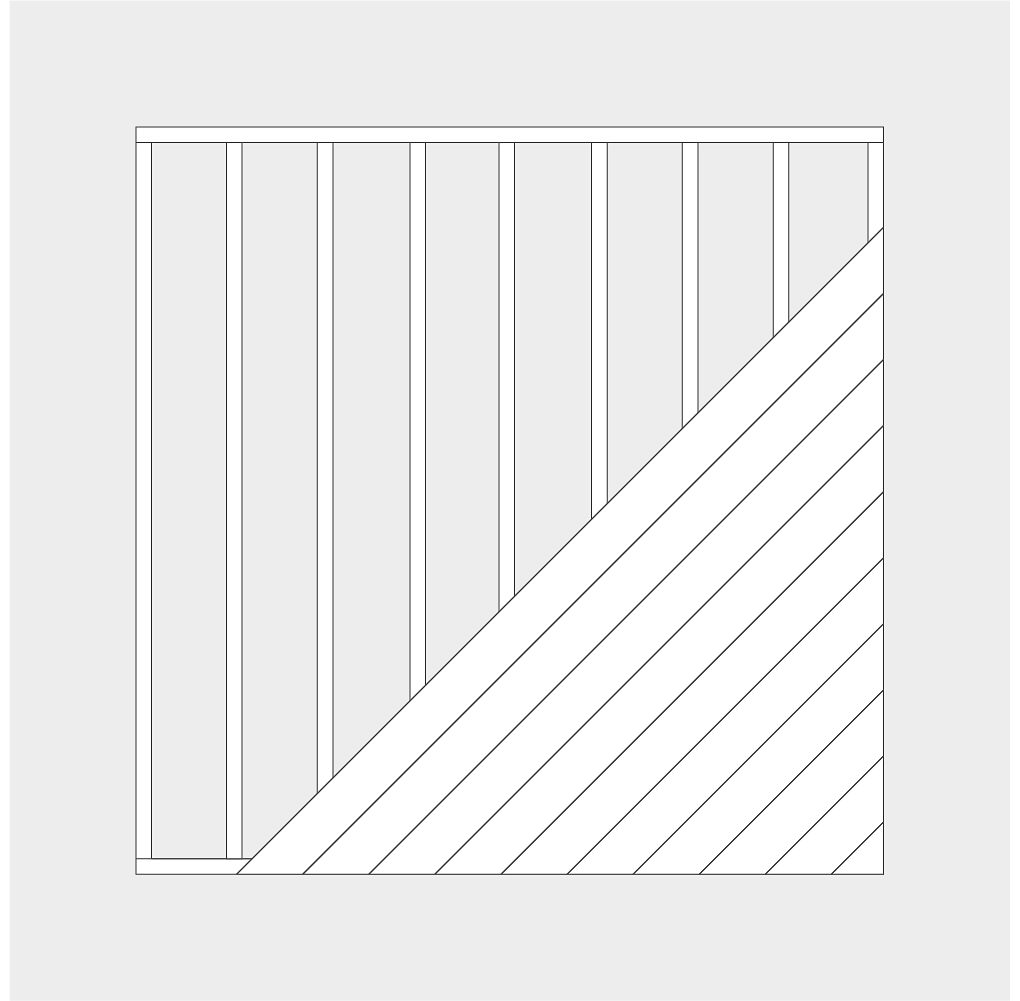
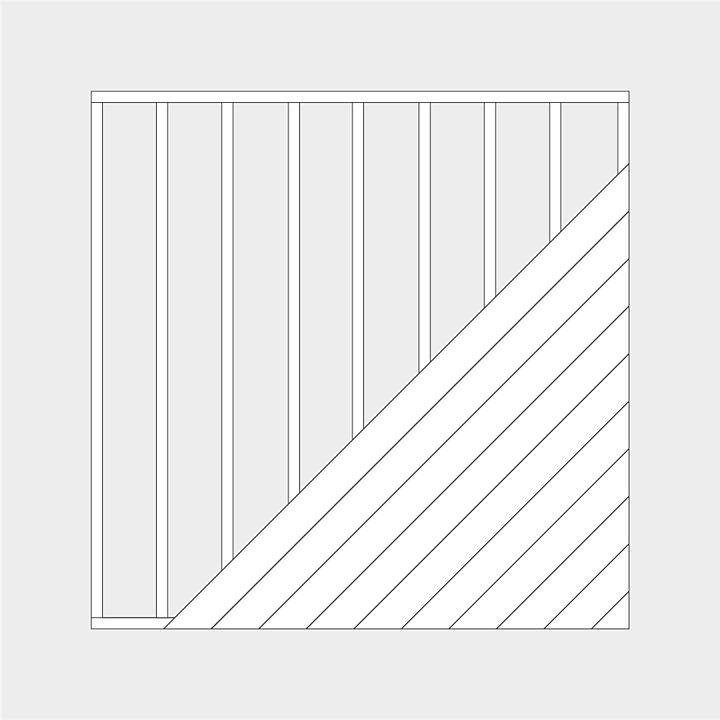
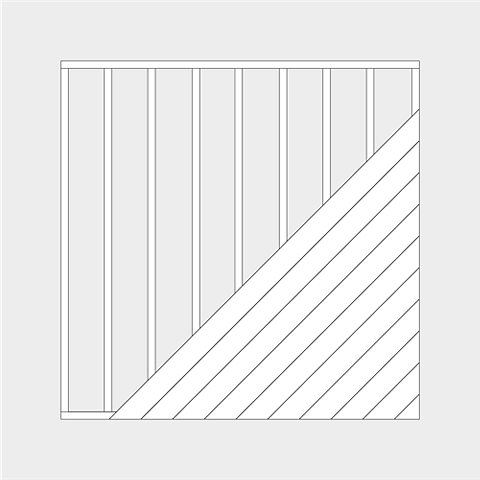
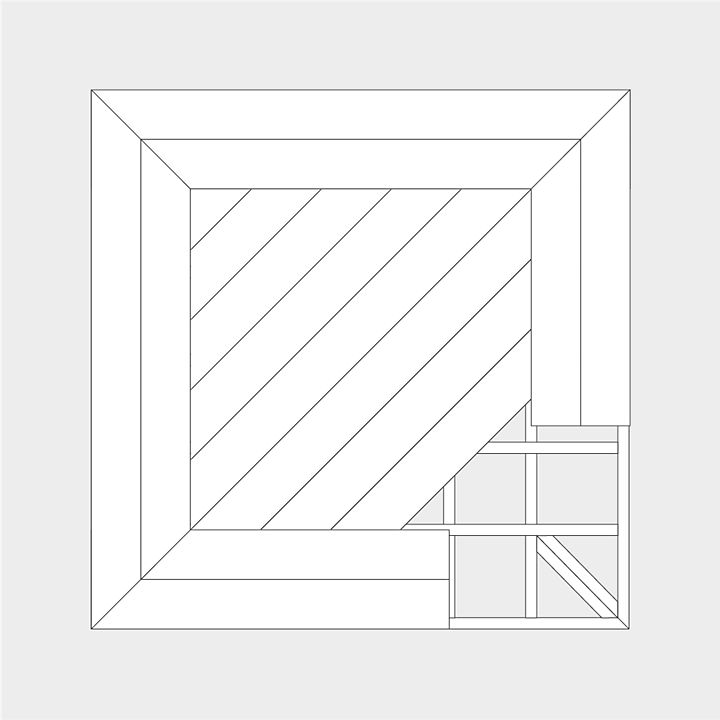
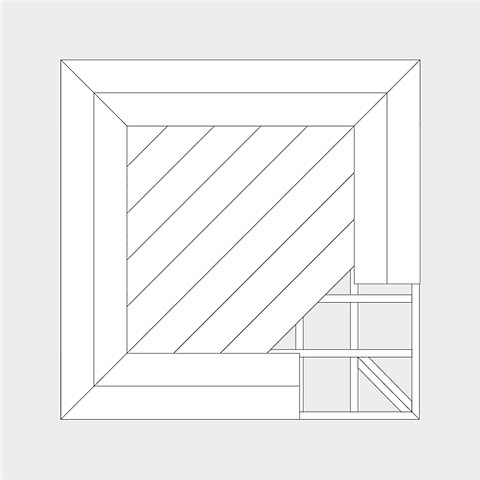
Diagonal deck boards
A more contemporary, yet still classic option, boards laid diagonally need joists spaced 300mm centre-to-centre for the structure to be secure.
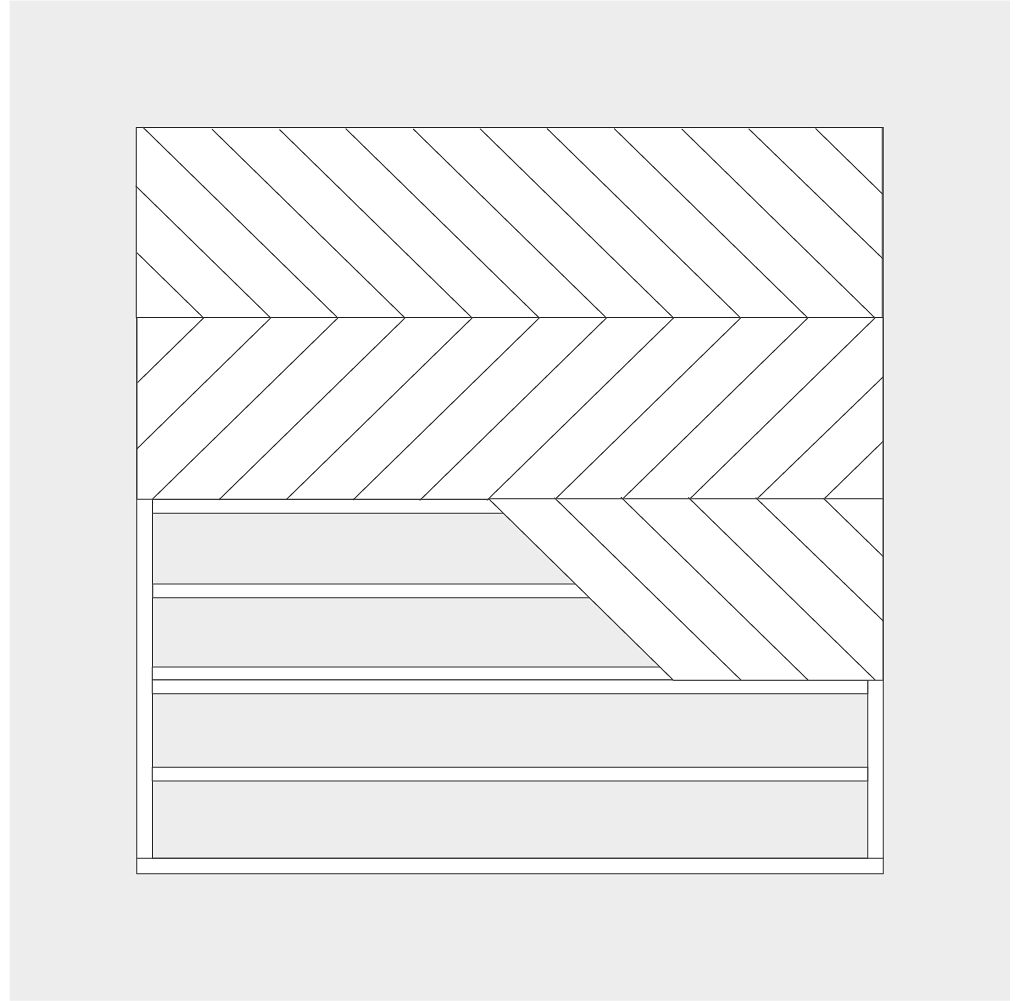
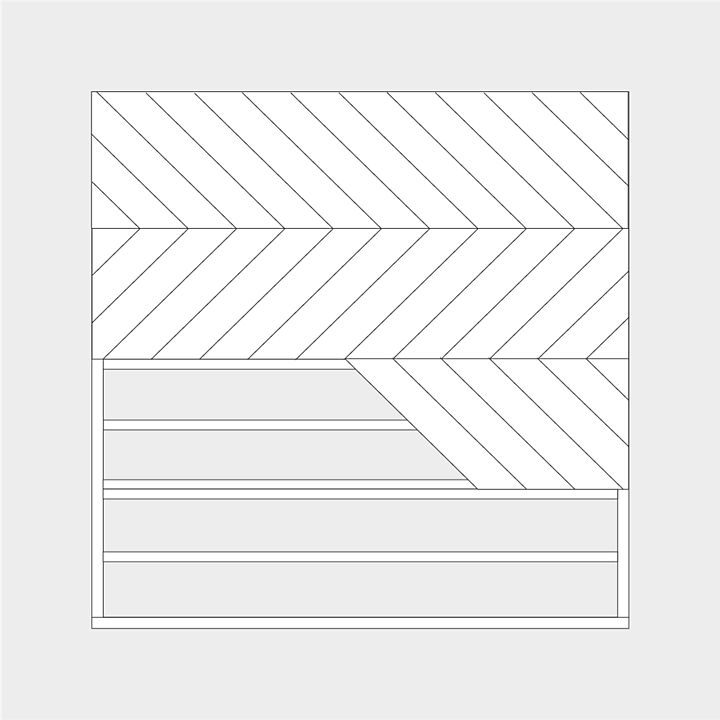
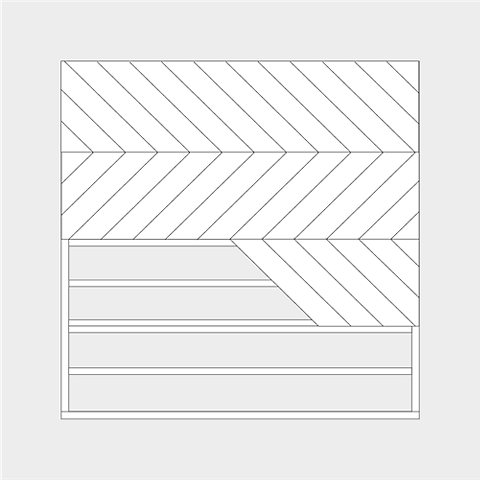
Chevron deck boards
For a decorative chevron pattern that is reminiscent of a parquet floor, your joists should measure 300mm centre-to-centre and you must lay a double joist where the boards meet in order to have space to fix them securely.
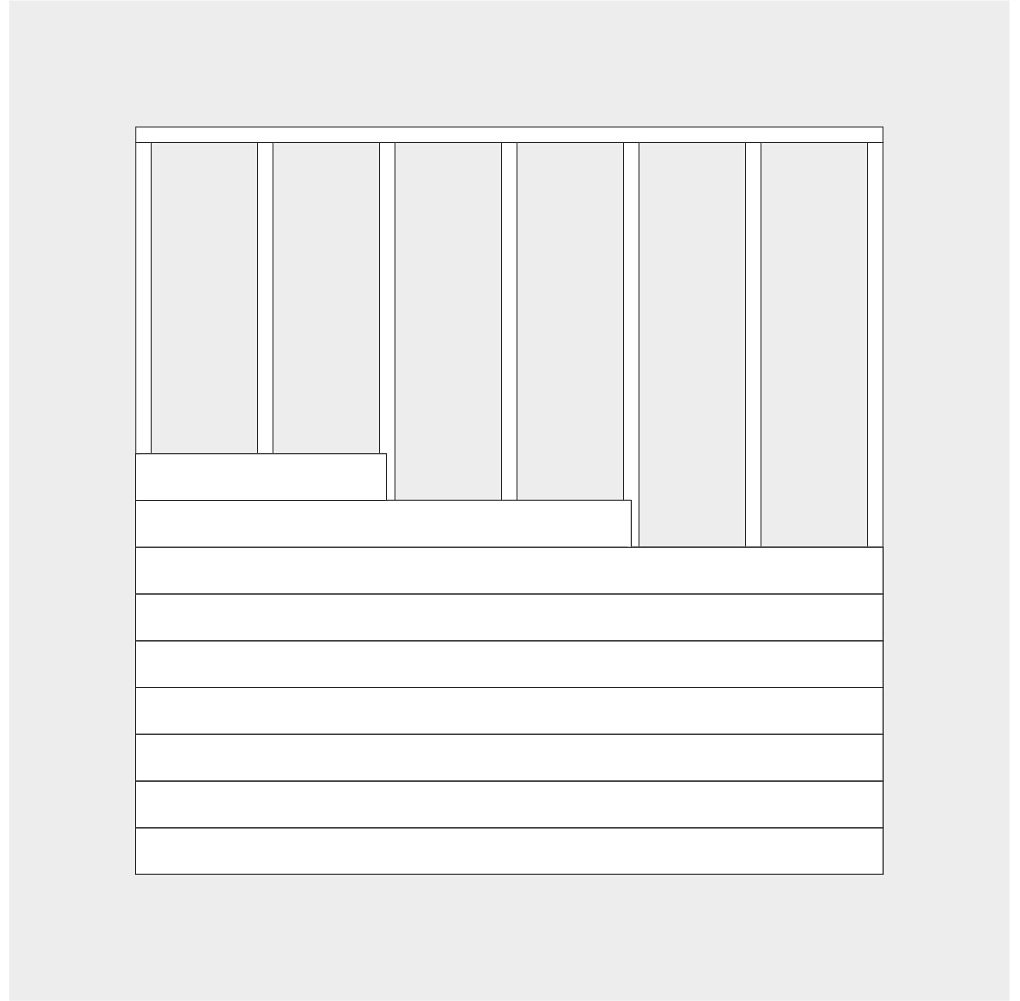
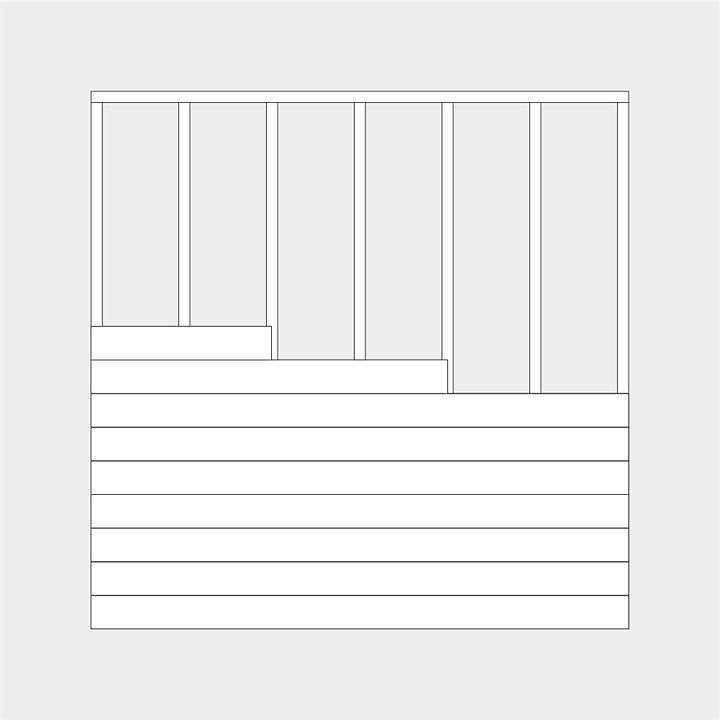
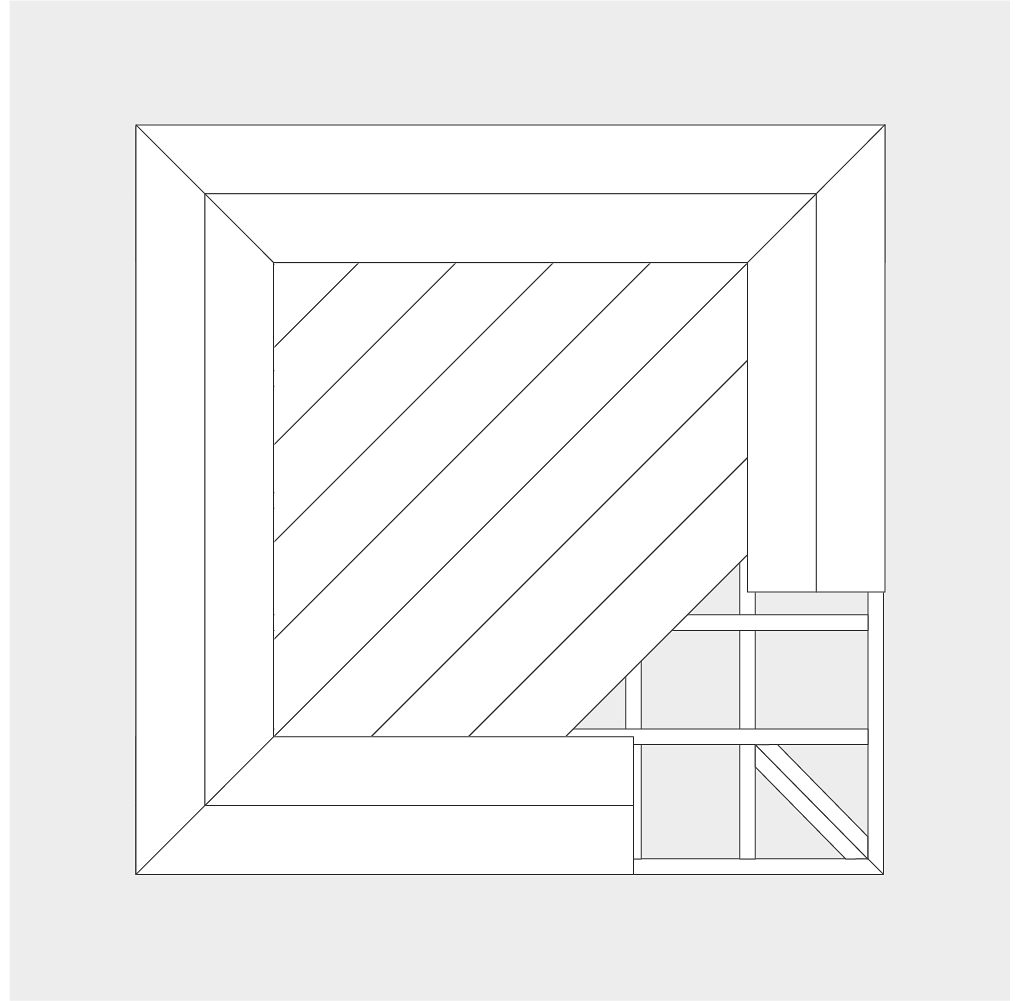
Picture frame deck boards
Another attractive option for those who want something a bit more decorative, the picture frame pattern has boards creating a border within the main design. You will need to adjust the framing to support the surface pattern in the corners. Decks are designed to take advantage of the angles of the joists for maximum stability, as illustrated.
When it comes to laying boards, reversible deck boards can be laid smooth or ridged side uppermost, or you can combine the various finishes for decorative effect. The easiest way to arrange them is at right angles to the supporting joists in a horizontal design – but you don’t have to. Decide on the pattern before you start, as the choice will affect the spacing and number of joists.
How to calculate how many deck boards you need
Once you’ve decided on the size and design of your decking, you’ll need to work out how many deck boards you’re going to need to complete your project.
To do this, we offer two easy-to-follow solutions - a decking calculator table or a simple equation. You don't need to do both, just choose your preferred method. Both options don't work for all calculations, so be sure to check which one best suits your project.
The table and the equation:
- are for horizontal decking designs only. Diagonal, chevron and picture frame designs require slightly more deck boards and wastage due to the angled cuts.
- allow for the standard recommended 10% wastage.
- include the expansion gaps required.
The table is based on our most popular timber board size – 2.4m long and 144mm wide - and includes the expansion gaps for timber (the calculations will be slightly different for Grassedeck, Walksure or solid composite deck boards). Just cross-reference your size of decked area (for example, 2 by 3m) and it presents the number of deck boards you will need.
If you're not opting for timber decking, or are looking to use timber boards in a different size than that referenced in the table, have a go with our decking equation.
For either option, you'll need to know:
- The material of your deck boards
- The size of your decking area
- The length of your deck board, in metres (L for length)
- The width of your deck board, in metres (W for width)
- The required expansion gap running between the length of your deck boards, in metres (EGL for Expansion Gap Length)
- The required expansion gap at the ends of your deck boards (EGW for Expansion Gap Width)
Expansion gaps explained
Deck boards are laid with a gap between each individual one - both along their length and their ends. These are known as expansion gaps as they allow rainwater to easily run through the decking (rather than pool in an unwanted puddle) and for the deck to expand and contract due to changes in the weather.
Timber deck boards require:
- a 5mm to 8mm gap along the length of the deck boards (EGL)
- and a 3mm gap along the ends of the deck boards (EGW)
Solid composite deck boards require:
- a 6mm gap along the length of the deck boards (EGL)
- and a 3mm gap along the ends of the deck boards (EGW)
Unlike with timber decking, solid composite deck boards don't allow for any flexibility with the size of the expansion gap running along the length of the deck boards, as the fixings used in laying only allow for one single size.
Decking calculator table
| Metres | 1 | 2 | 3 | 4 | 5 | 6 | 7 | 8 | 9 | 10 |
|---|---|---|---|---|---|---|---|---|---|---|
| 1 | 3 | 6 | 9 | 12 | 15 | 18 | 21 | 24 | 27 | 31 |
| 2 | 6 | 12 | 18 | 24 | 31 | 37 | 43 | 49 | 55 | 61 |
| 3 | 9 | 18 | 27 | 37 | 46 | 55 | 64 | 73 | 82 | 92 |
| 4 | 12 | 24 | 37 | 49 | 61 | 73 | 85 | 98 | 110 | 122 |
| 5 | 15 | 31 | 46 | 61 | 76 | 92 | 107 | 122 | 137 | 153 |
| 6 | 18 | 37 | 55 | 73 | 92 | 110 | 128 | 146 | 165 | 183 |
| 7 | 21 | 43 | 64 | 85 | 107 | 128 | 150 | 171 | 192 | 214 |
| 8 | 24 | 49 | 73 | 98 | 122 | 146 | 171 | 195 | 220 | 244 |
| 9 | 27 | 55 | 82 | 110 | 137 | 165 | 192 | 220 | 247 | 275 |
| 10 | 31 | 61 | 92 | 122 | 153 | 183 | 214 | 244 | 275 | 305 |
Decking calculator equation
Ensure all measurements are in the same units.
Step 1: Calculate the surface area of your decking
Multiple the length (L) of your decking area by the width (W).
L x W = Decking Surface Area (DSA) in m2
Step 2: Calculate the coverage of your deck boards
Add the deck board width (W) to the Expansion Gap Length (EGL).
Add the deck board's Length (L) to the Expansion Gap Width (EGW).
Multiple these numbers together.
(W + EGL) x (L + EGW) = Single Board Coverage (SBC) in m2.
Step 3: Calculate the number of boards required
Multiple the Single Board Coverage (SBC, as calculated in step 2) by 1.1.
Divide the Decking Surface Area (DSA, as calculated in step 1) by the Single Board Coverage (SBC).
DSA / SBC x 1.1 = Total number of boards needed including wastage


Now that you've completed the planning process. it's time to start laying your decking and we have a number of articles to help you every step of the way. So, depending on your project, choose from the following how to guides to take your decking project to the next stage.