How to fix problems with tile grout
A tiled wall won’t stay perfect forever and there may be issues that you need to fix, like dirty-looking grout. Refreshing and cleaning this grout is an easy, quick fix that can make a big impact in your bathroom or kitchen. The results will make the tiles look revitalised and renewed, improving the whole look of the room.
In this guide we’ll talk you through how to:
- Clean tile grout
- Refresh tile grout with a grout pen
- Remove tile grout.
Materials:
Tools:
- Soft cloth
- Dust sheet
- Grout remover or electric grout remover tool. An electric grout remover is best suited if you have lots of grout to remove.
- Sponge
- Scrubbing brush or an old stiff toothbrush
- Vacuum cleaner - to vacuum away dust. We recommend a hand-held vacuum cleaner or a vacuum with a nozzle attachment.
Safety kit:
- Gloves - to protect your skin from cleaning products
- Safety goggles - to protect your eyes from flying grout as it is removed
Safety first
- Ensure you use chemicals that are designed for the surface you are cleaning, and always follow the product instructions.
It’s not always necessary to rake out dirty old grouting - minor staining and fungal growths can be removed with a specially formulated grout cleaner. It contains a variety of detergents and biological agents to clean the grout and discourage mould.
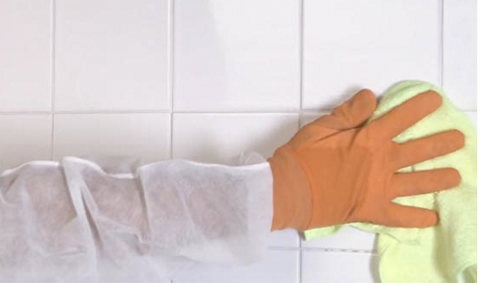
1. Clean with soap and water
Wipe down the tiled area with a cloth and soapy water to remove dirt, mould or soap residue.
If there is limescale on the surface of the tiled area, use a limescale remover and scrub the area clean.


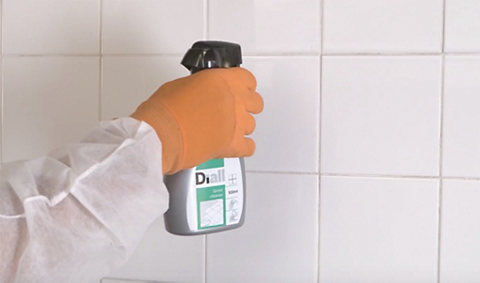
2. Apply grout cleaning spray
If the grout is still stained or discoloured clean it to get rid of any mould or stains by spraying a grout-cleaning solution directly onto the grout joints. Allow to activate for however long the product instructions state.
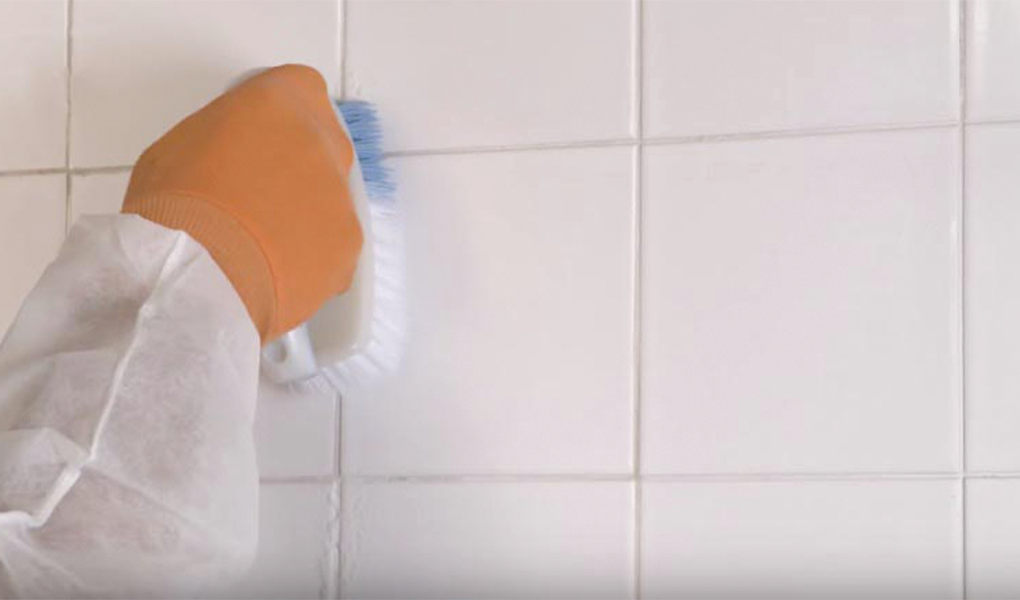


3. Scrub the joints
Scrub the joints with a stiff scrubbing brush. An old stiff toothbrush is always handy to get into corners and awkward areas.
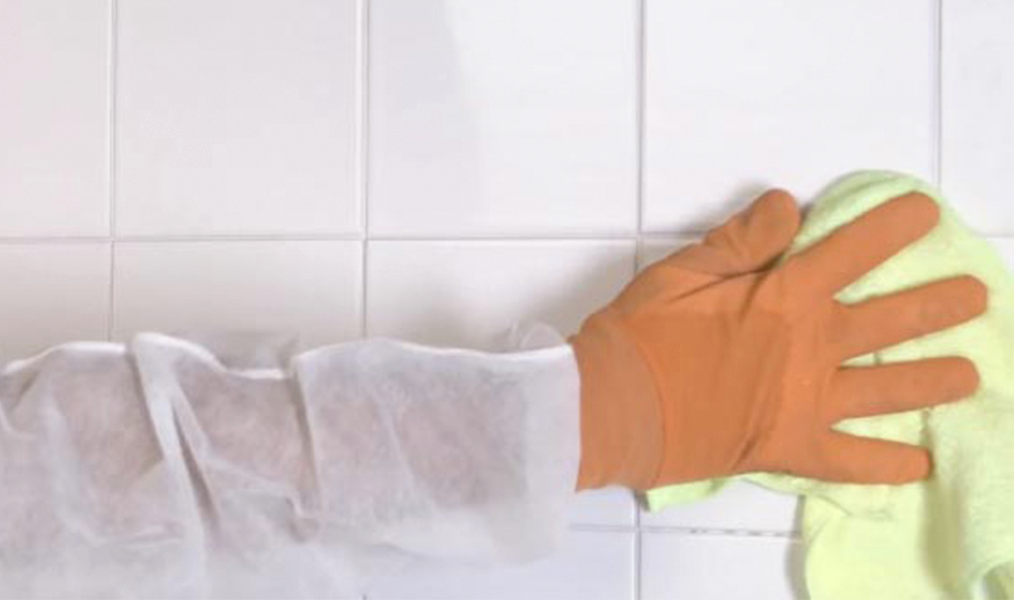
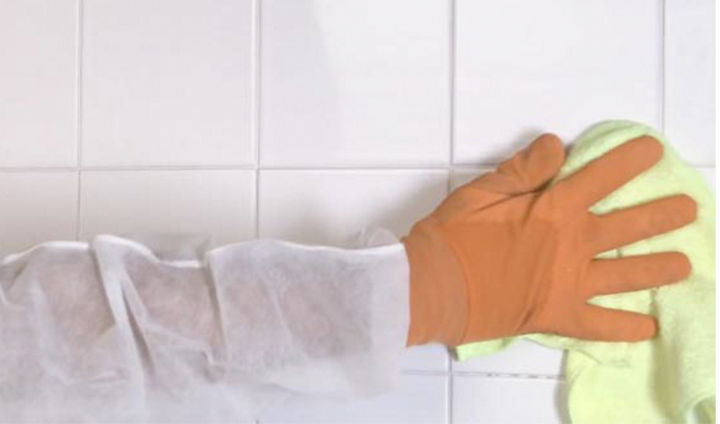
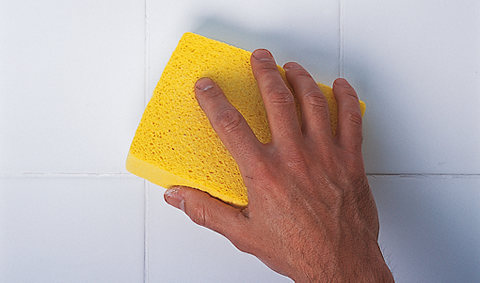
4. Rinse with clean water
Rinse off with clean water and a sponge and dry the area with a cloth. Allow time for the grout to dry naturally and see if you are happy with the result and repeat the process again if necessary.
If the grout is still stained, use a grout pen. A grout pen or tube can restore old grout leaving an anti-mould finish.
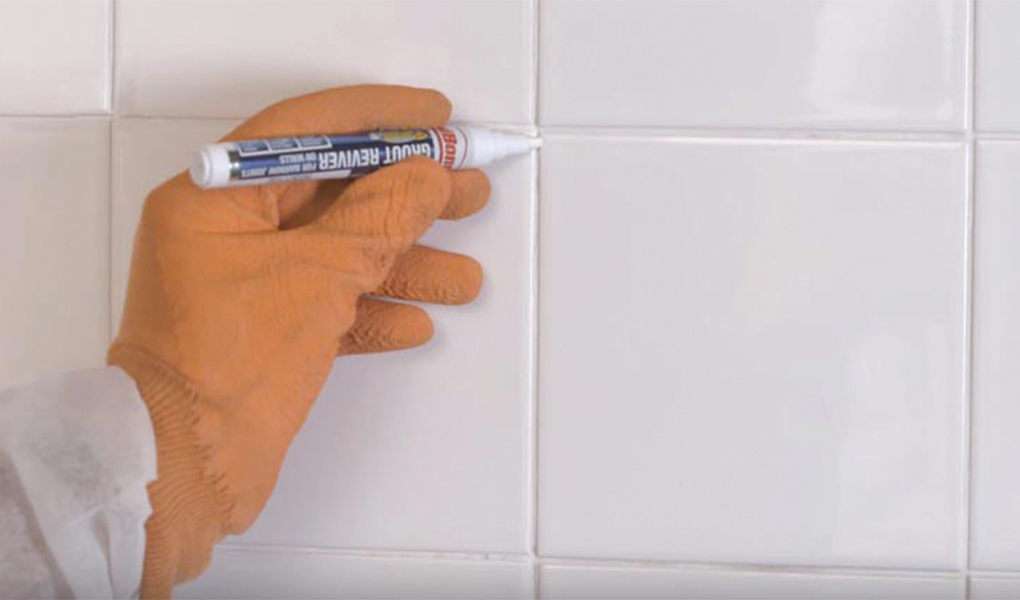

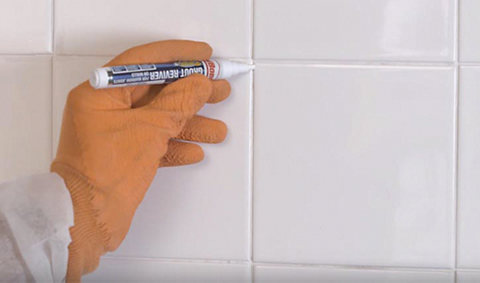
Shake the grout pen until you hear it rattle. Some nibs are reversible so choose which end you want to use. The round end covers larger areas and the flat end will give neater lines. Hold the nib down in the gap between the tiles until paint starts to come out.
Hold it like a regular pen but be careful you're not too heavy-handed as the paint will come out fast and overflow. Use it on vertical grout lines first, and then the horizontal lines. Work in small sections at a time, so you do not miss out any areas. If you get any paint on your tiles, use a damp cloth to remove it immediately before it dries.
Leave to dry for 60 minutes (or as recommended by the manufacturer) and apply a second coat if needed.
If you’ve tried cleaning your grout and restoring it with a grout pen, but you’re still unhappy with the look of the grout, the other option is to remove it and replace it with new grout.
1. Protect the surrounding area
If removing grout from wall tiles, lay down a dust sheet to protect the surrounding surfaces from falling tile pieces.

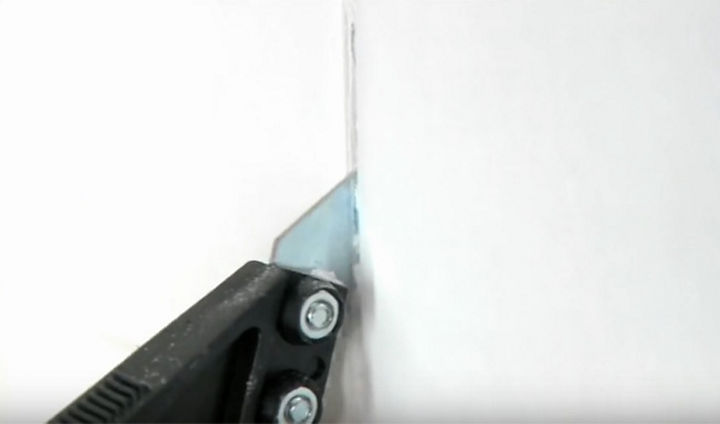
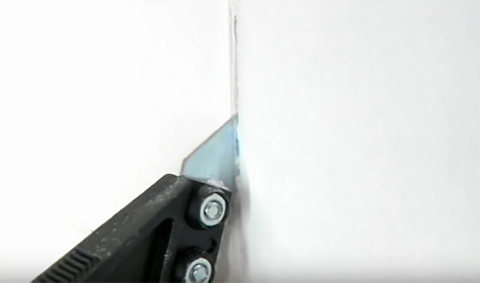
2. Remove the grout
Remove the grout from around the tiles with a manual or electric grout remover. If using a manual grout remover, place the blade onto the grout and scrape along the join between the tiles to remove the grout.
If using an electric grout remover, choose a suitable tip and insert into the tool, following the product instructions. Plug the tool into an electricity socket and hold it against the grout at a 45 degree angle. Turn it on to a low speed and make small strokes to remove the grout. Adjust the speed and pressure if needed.
Remove as far back as the thickness of the tile. Do all the vertical joints first and then the horizontal ones, to make sure that you don’t miss any areas.


3. Clean the tiles
There will be a lot of dust and debris when you remove the old grout. Vacuum all the dust away from between the tiles before you use the damp cloth over the tiles.
Once all the grout is removed, wipe the whole surface with a damp cloth or sponge to remove any remaining flakes.