Skip to content

How to build a stone garden wall

A stone wall could be part of your landscaping project or you could just want to make a more interesting boundary wall. A decorative stone wall can really add personality to you garden whilst being a functional essential. Use our guide to add some foundations to your project.


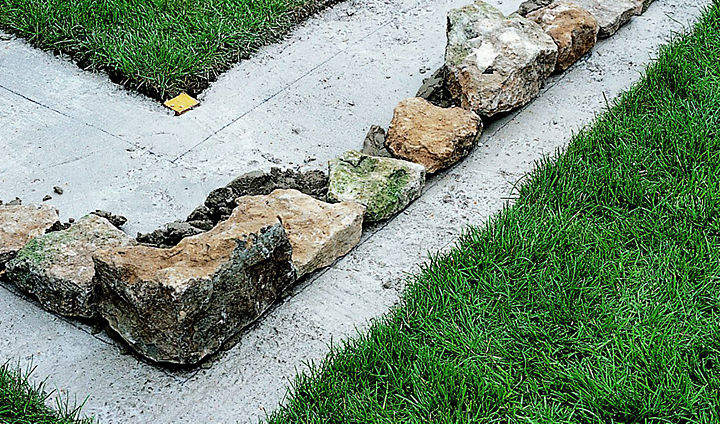
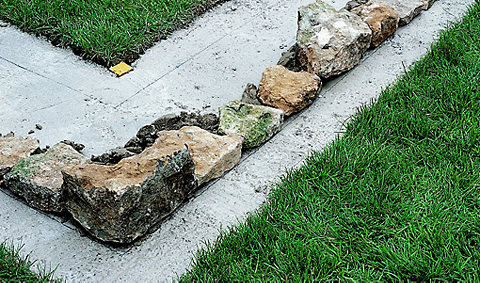
Lay the footing as you would for a brick wall. The minimum width of a double-faced freestanding stone wall is 450mm, and your footing should extend by 120mm on both sides. You'll need to mark the footing to point out the line each face of the wall will follow.

A person wearing gloves using a bricklayer's hammer to chip pieces off a stone to shape it into a corner stone.A person wearing gloves using a bricklayer's hammer to chip pieces off a stone to shape it into a corner stone.A person wearing gloves using a bricklayer's hammer to chip pieces off a stone to shape it into a corner stone.A person wearing gloves using a bricklayer's hammer to chip pieces off a stone to shape it into a corner stone.

Step 1

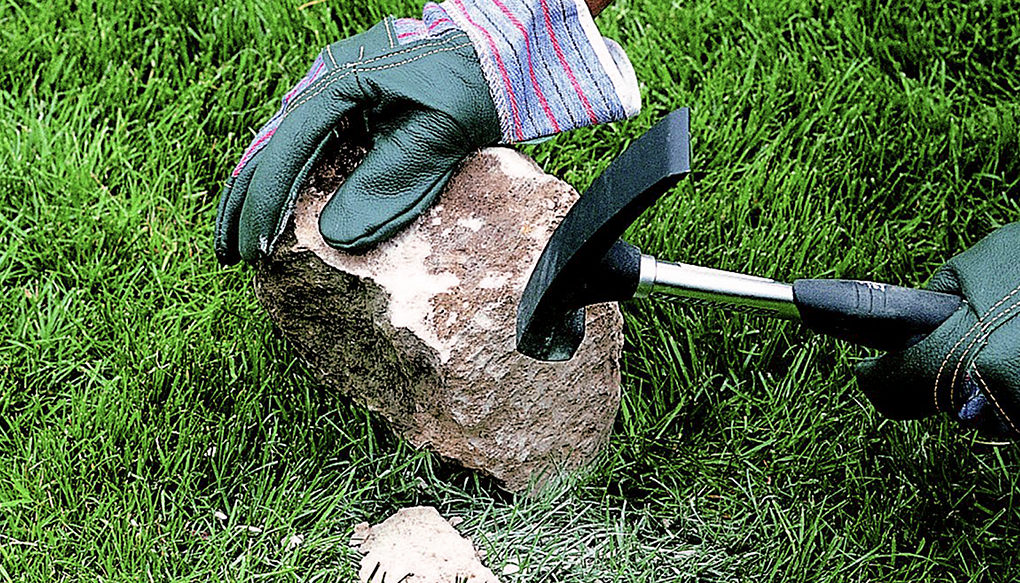
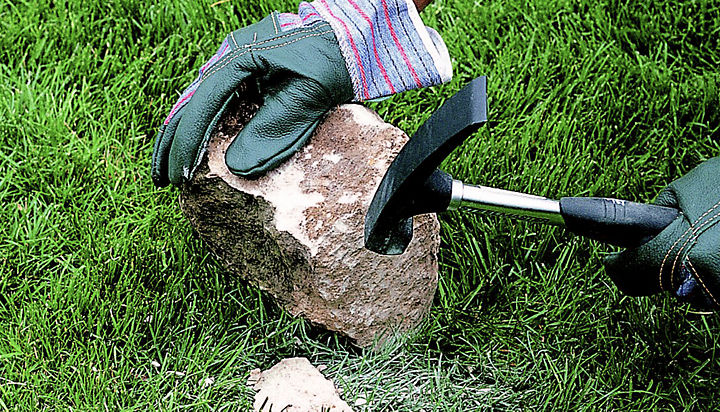
Sort through your pile of stones and pick out some likely corner stones (or 'quoins'). If there are no obvious ones, you can shape a stone by chipping it with a bricklayer's hammer or a stone axe. But make sure you wear your gloves and safety goggles when you do this.

Laying a stone on top of a bed of mortar, which has been laid on top of a concrete footing.Laying a stone on top of a bed of mortar, which has been laid on top of a concrete footing.Laying a stone on top of a bed of mortar, which has been laid on top of a concrete footing.Laying a stone on top of a bed of mortar, which has been laid on top of a concrete footing.

Step 2

Put mortar onto the footing and set a quoin at each end of it, on the marked lines.
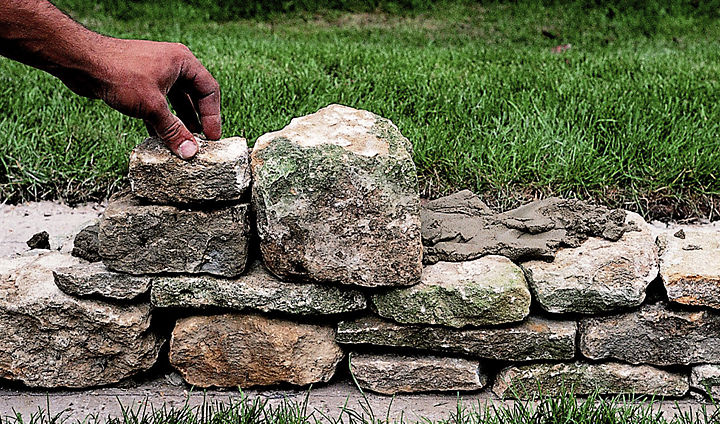
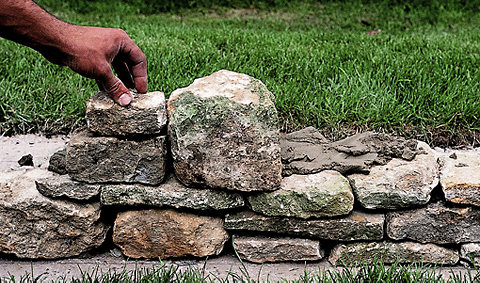
A line of stones, varying in size and shape, laid on top of a bed of mortar over a concrete footing.A line of stones, varying in size and shape, laid on top of a bed of mortar over a concrete footing.A line of stones, varying in size and shape, laid on top of a bed of mortar over a concrete footing.A line of stones, varying in size and shape, laid on top of a bed of mortar over a concrete footing.

Step 3

Carry on filling in the line of stones between the two ends. You can use a mixture of stones (they don't all have to be the same height).

Holding a spirit level against stones built up in the corner of a stone wall to check they are level.Holding a spirit level against stones built up in the corner of a stone wall to check they are level.Holding a spirit level against stones built up in the corner of a stone wall to check they are level.Holding a spirit level against stones built up in the corner of a stone wall to check they are level.

Step 4

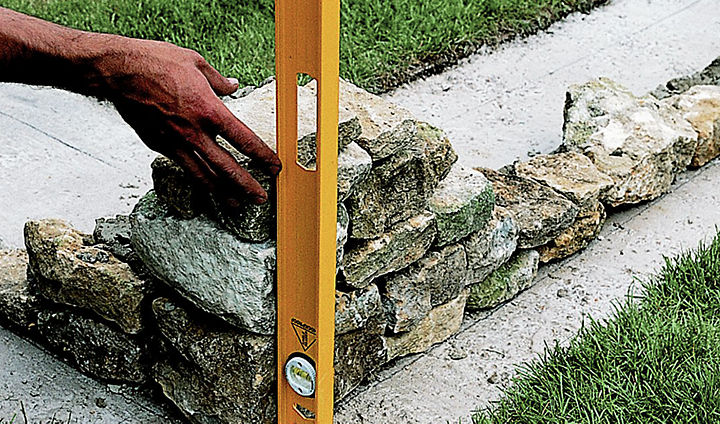
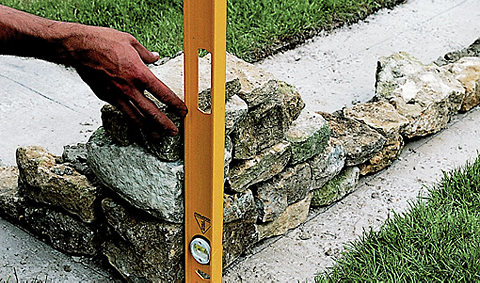
Build up the corners and ends first, as you would if you were laying bricks. Use a spirit level to ensure the quoins are vertical. Next, stretch a level line from one end of the wall to the other, 300mm-400mm above the footing. Move the line up the wall as you build - using it as a guide until you reach the finished wall height, which must be level.

Stones of various sizes and shapes laid next to and on top of each other to form a stone wall.Stones of various sizes and shapes laid next to and on top of each other to form a stone wall.Stones of various sizes and shapes laid next to and on top of each other to form a stone wall.Stones of various sizes and shapes laid next to and on top of each other to form a stone wall.

Step 5

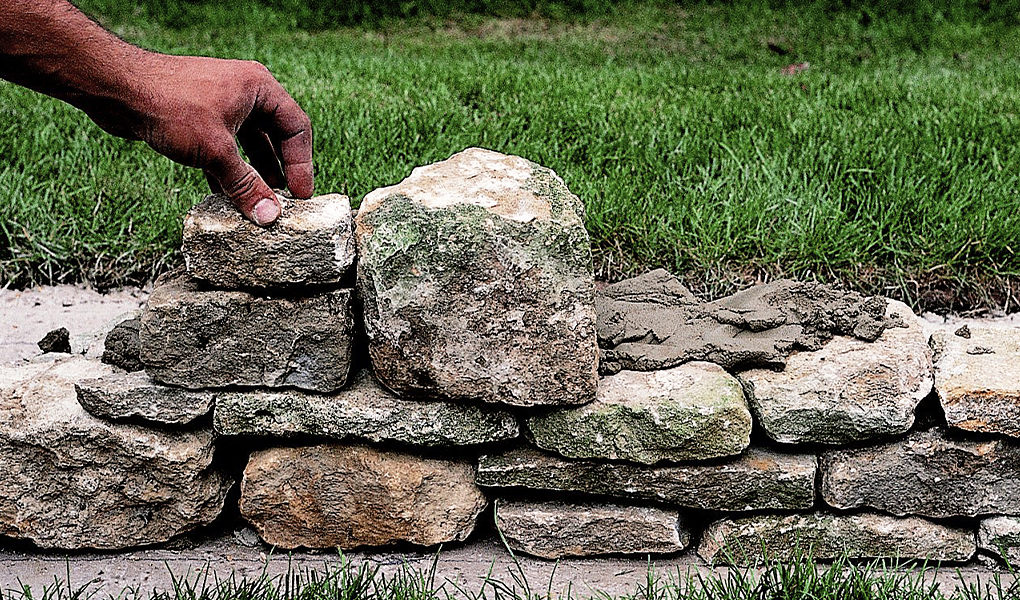
Work on one side of the wall up to a height of no more than 500mm, then go to the other side and build that side up roughly level with the first. You can use large stones (known as 'jumpers') if you like, which will change the height of the course. There's no need to work from one end to the other.
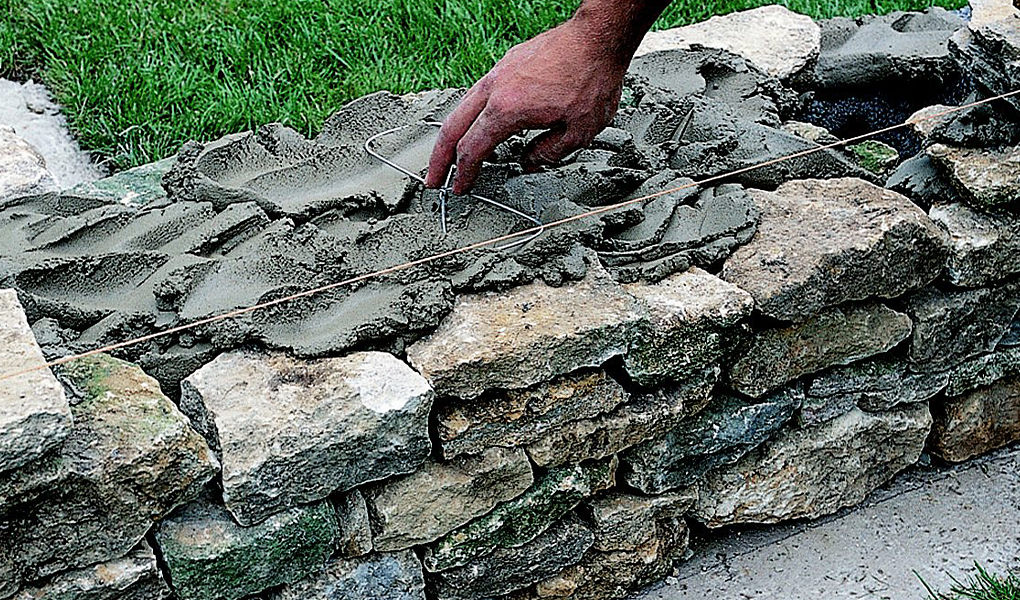
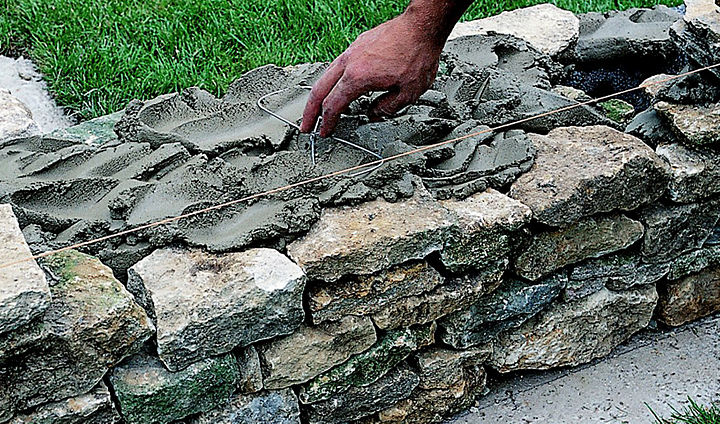
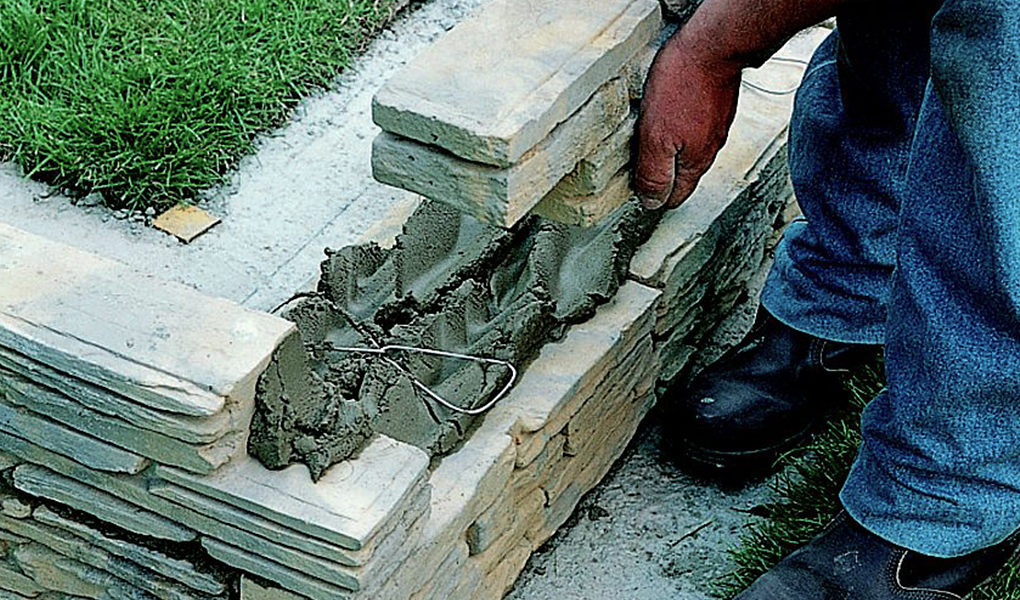
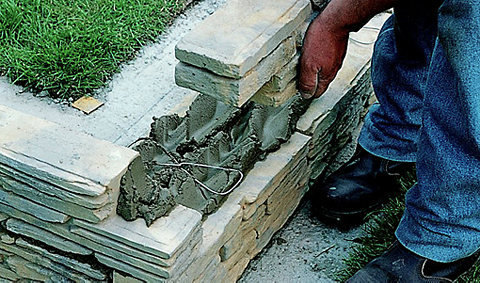
Person placing a metal wall tie into mortar, which is laid on top of a half completed stone wallPerson placing a metal wall tie into mortar, which is laid on top of a half completed stone wallPerson placing a metal wall tie into mortar, which is laid on top of a half completed stone wallPerson placing a metal wall tie into mortar, which is laid on top of a half completed stone wall

Step 6

Fit metal wall ties no more than 900mm apart on the horizontal plane and 450mm apart on the vertical plane. Fill the centre with mortar and small off-cuts of stone as you go.
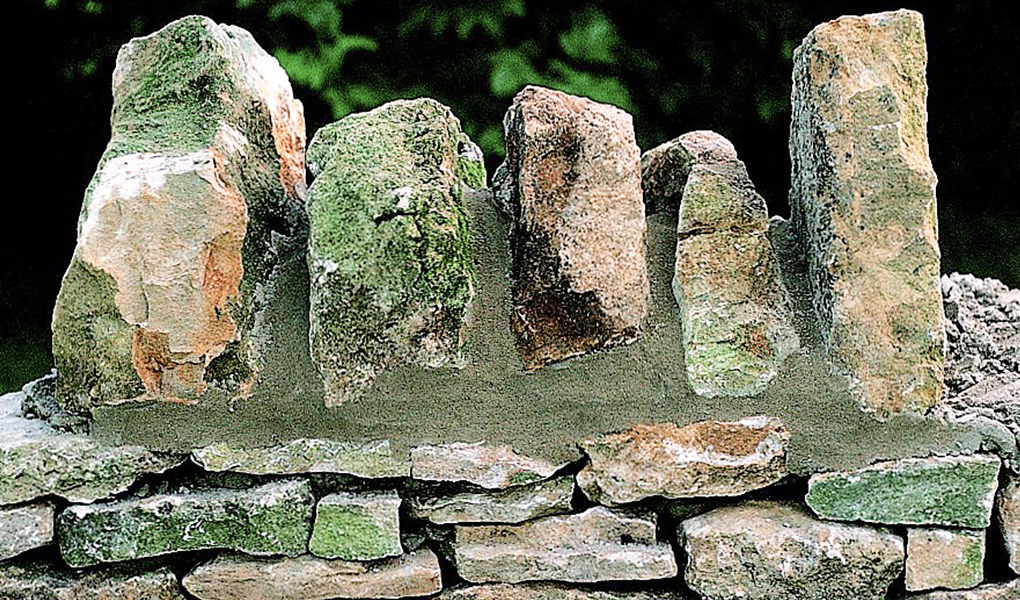
Alternating large and small stones placed upright on top of a completed stone wall.Alternating large and small stones placed upright on top of a completed stone wall.Alternating large and small stones placed upright on top of a completed stone wall.Alternating large and small stones placed upright on top of a completed stone wall.

Step 7

If you want to cap your stone wall, there are various ways you can do it - including using slab or even brick. One of the most popular methods is 'cock and hen' capping, where you alternate upright large and small stones, which are usually held in place with mortar. Before the mortar is completely dry, scrape away any surplus with a trowel and brush the stones with a medium-soft banister brush.


Reconstituted stone comes in a wide range of colours, shapes and sizes. The composite blocks we're featuring here are interlocking, which makes them very quick and easy to build.

A person placing an interlocking reconstituted stone block onto mortar that has been applied to a partially completed wall.A person placing an interlocking reconstituted stone block onto mortar that has been applied to a partially completed wall.A person placing an interlocking reconstituted stone block onto mortar that has been applied to a partially completed wall.A person placing an interlocking reconstituted stone block onto mortar that has been applied to a partially completed wall.

Step 1

Start by spreading mortar on the footing and laying the first course. Build course by course and add mortar to all the joints. With these interlocking blocks, there's no need to build up ends and corners first.

Step 2

When your wall is the height you want, spread mortar on the top course and you're your reconstituted stone slabs or special coping stones.